12 | INSTALLATION RULES
HORIZONTAL INSTALLATION
On loadbearing walls stones must always be positioned horizontally following the grain. They must connect together with perfect joints and never with vertical joints. Installing horizontal courses is natural and essential, as with the natural development of walls while being constructed.
(The photos compare the installation of the same Geopietra® manufactured stone veneer)
NO : rules have not been followed in terms of aesthetics to produce an authentic look, horizontal courses and correct joints between pieces, or grouting. The three-dimensional nature of the wall covering has been ruined and only the decorative character of the flat pieces used in a mosaic pattern is obvious.
YES : following and focusing on the installation rules makes it impossible not to appreciate the supporting role of the murogeopietra and not just the aesthetics.
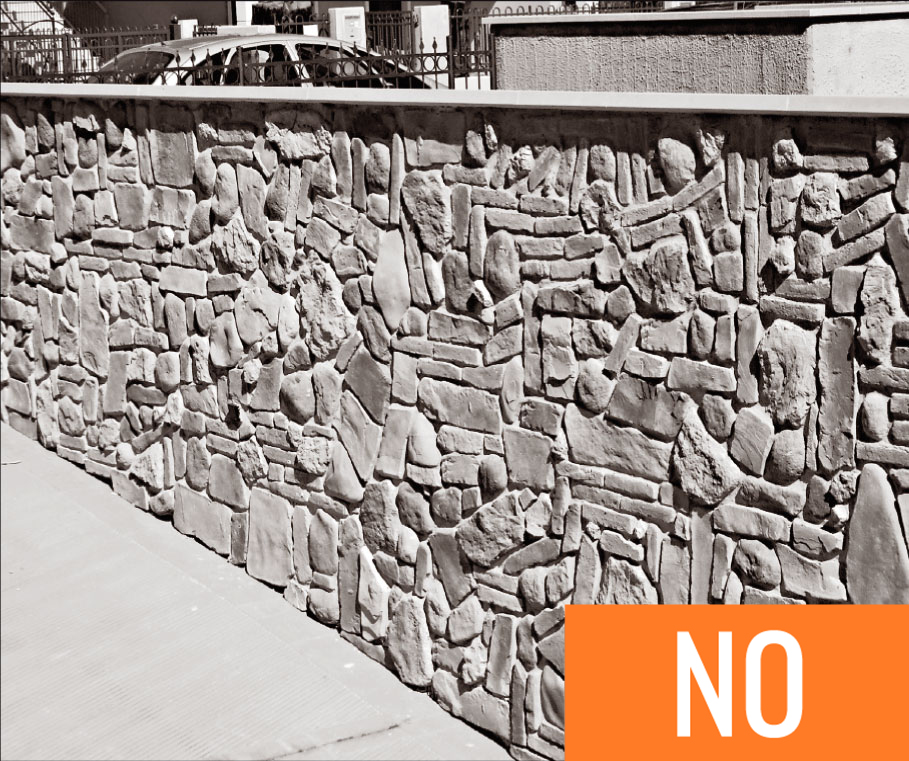
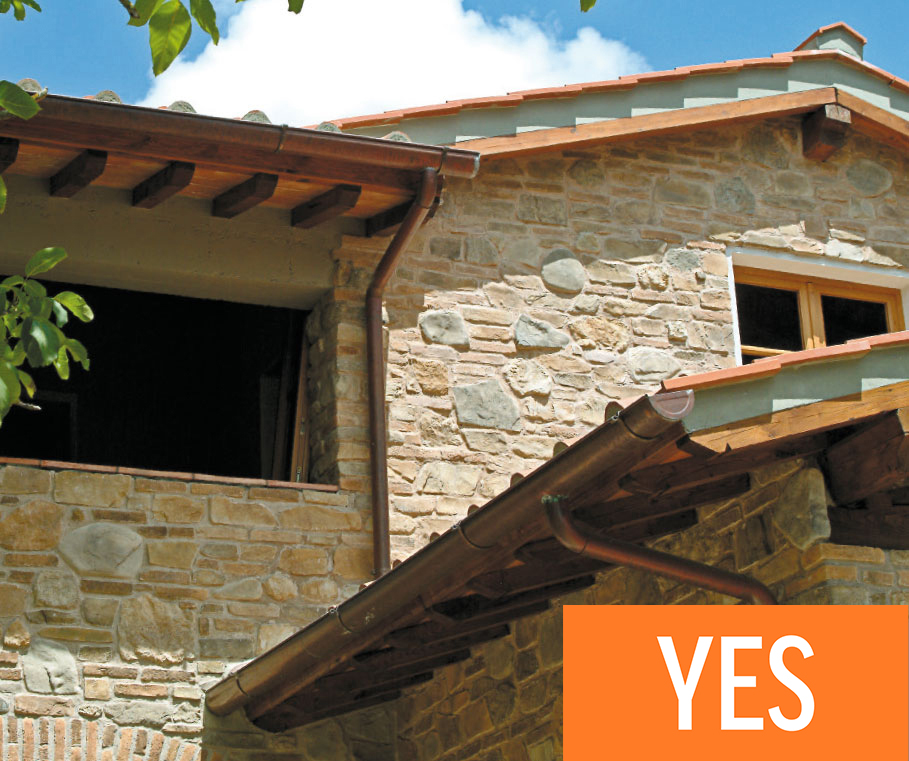
ARCHES AND PILLARS
The load of forces with a loadbearing wall near an opening are distributed transversally as a result of an arch (or in the small openings via the vertical installation of some stones).
(The material in the first photograph isn’t Geopietra®)
NO : Even though the progression of the arch in the wall underneath has been followed, the stones are positioned alongside each other without any supporting joint effect (note the formation of the + mark and the joint). Furthermore, the chosen model of stone and the pillar sections are not in proportion and the blend of colours is unnatural. This installation does not look authentic.
YES : Thanks to the vertical positioning which gives the loadbearing arch shape our covering looks totally authentic.
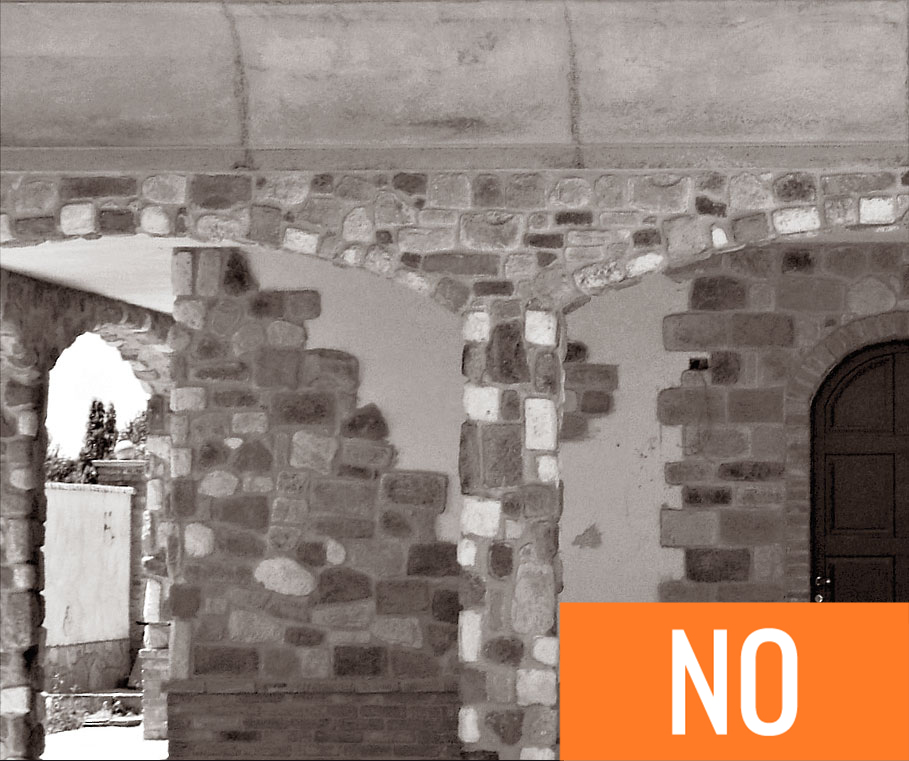
BEAMS WITH WIDE HORIZONAL OPENINGS
The load of forces with a loadbearing wall in the case of wide horizontal openings and in place of an arch must be distributed over a beam or support along the entire opening.
NO : Covering wide openings by just fitting something over what is already there (an issue which is increasingly prevalent in modern building) does not give a convincing result. Irregular, chaotic installation hints at a vague idea of a loadbearing wall. There are no suitable ground supports and architraves in proportion, even hypothetically, to the weight of the stone construction.
YES : The simple insertion of a decorative beam satisfies, even if only visually, the need for a wall support above the opening and makes the work look authentic.
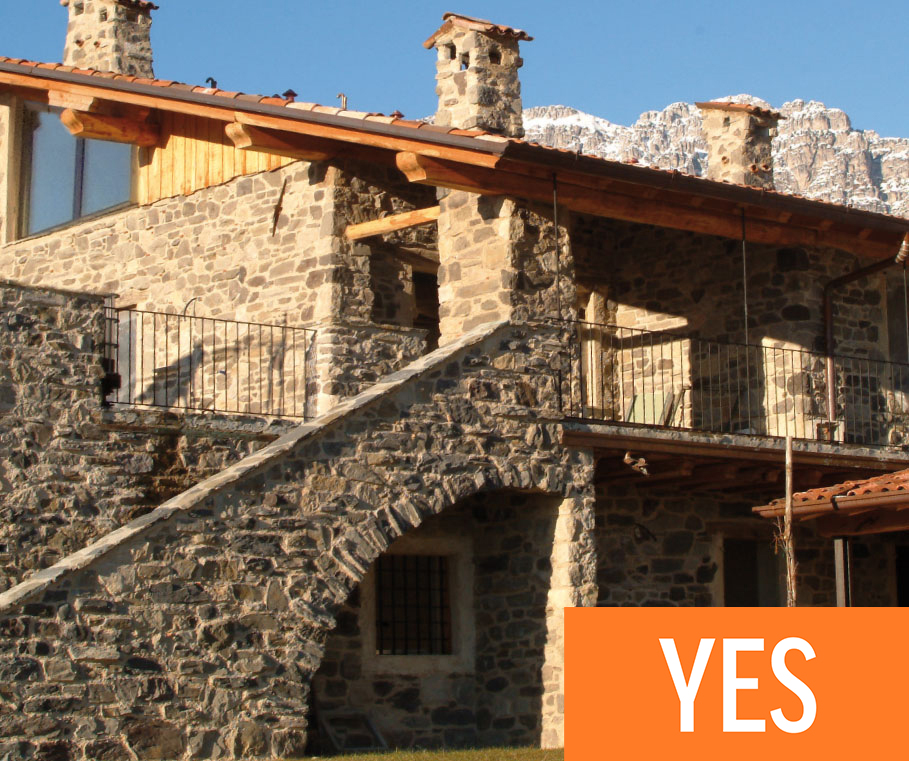
BALCONIES
Balconies covered with stone do not give an authentic-looking result without a loadbearing structure from the ground which would be required to support the weight in theory. Therefore in accordance with the rules of architecture only solutions where the use of the stone is plausible should be considered.


NO : If the intention is to achieve authenticity with manufactured stone veneer, covering an overhanging balcony without a ground support will not give the desired result. Likewise, the use of corner pieces on the lower part is incorrect and counterproductive with regard to looking plausible.
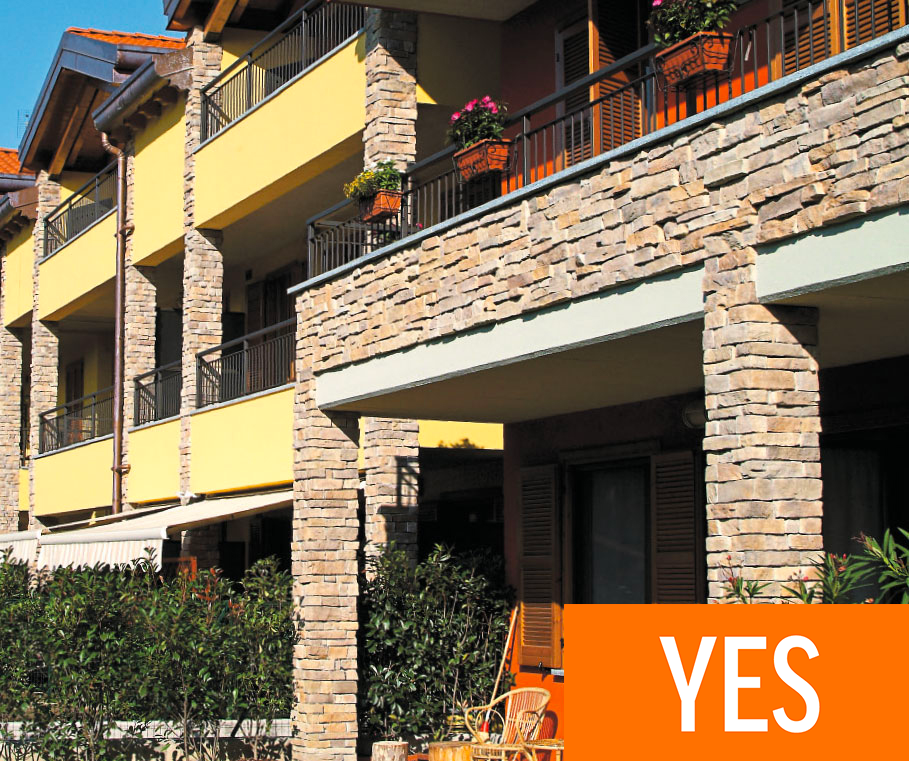
YES : Covering a balcony in manufactured stone veneer requires ground supports and architraves which would be proportional to a hypothetical construction in natural stone.
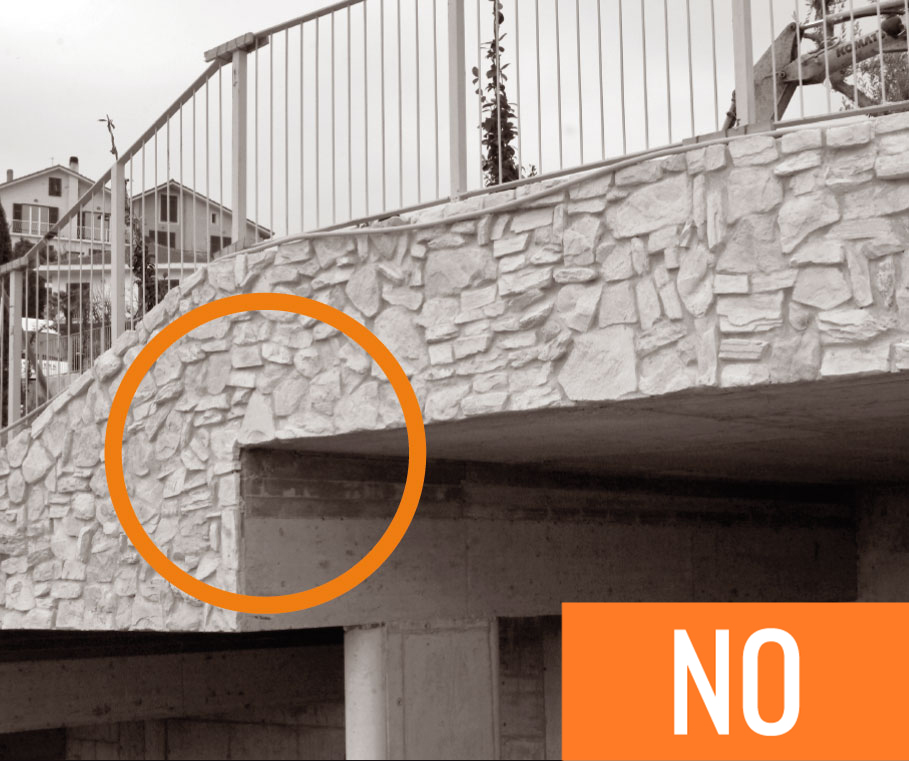
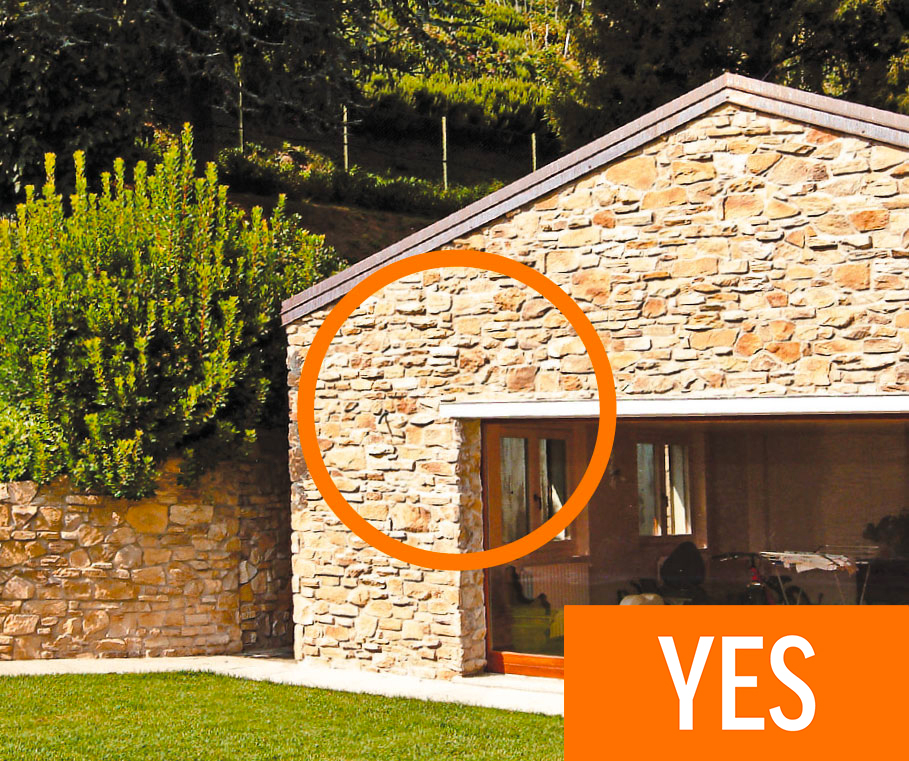
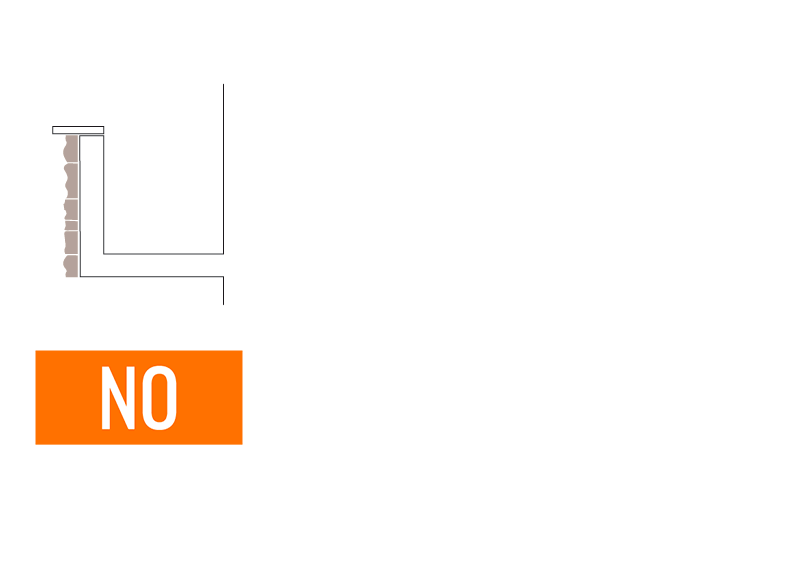
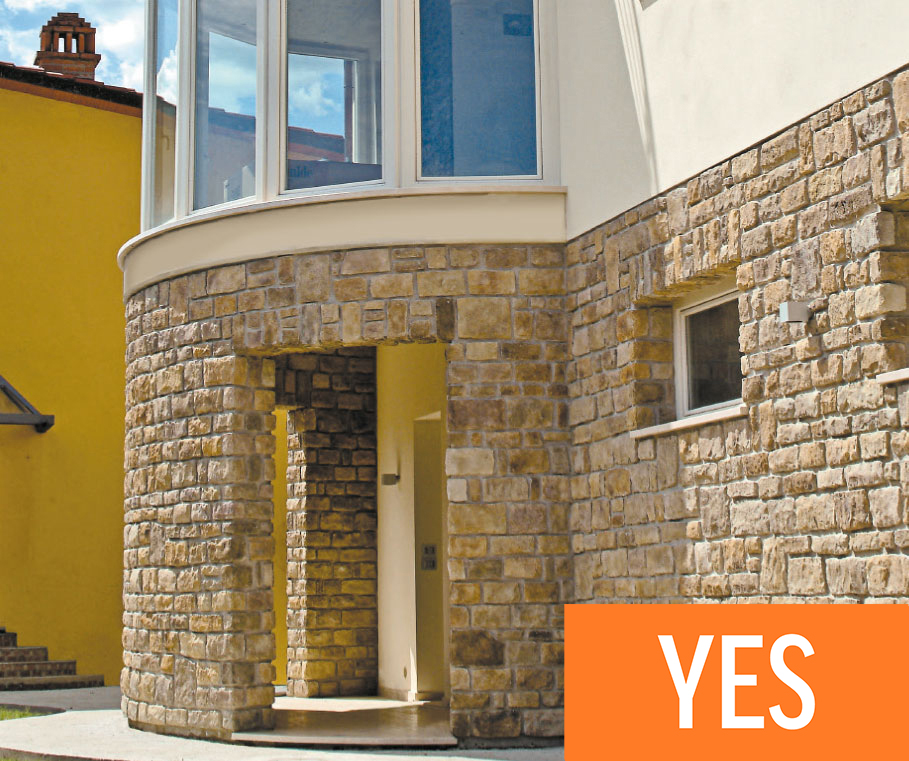
CORNERS AND THICKNESS
Current trends in architecture favour natural stone alongside other construction materials, producing solutions that enhance aesthetic value especially.
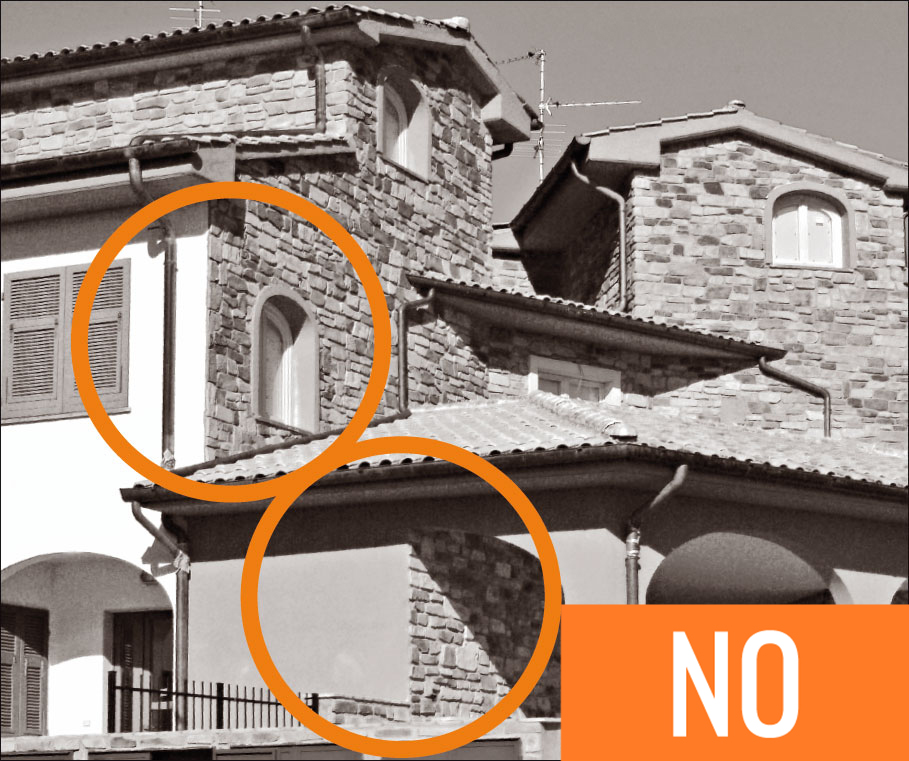
NO : The photo shows an error in the corner finish on the house. Disregarding finishing details such as this can make even a good installation seem unrealistic. Work on corners should never come to an abrupt end. To give the covering a three-dimensional nature corner pieces should be used to continue along the corner of the wall for at least 25-40 cm.
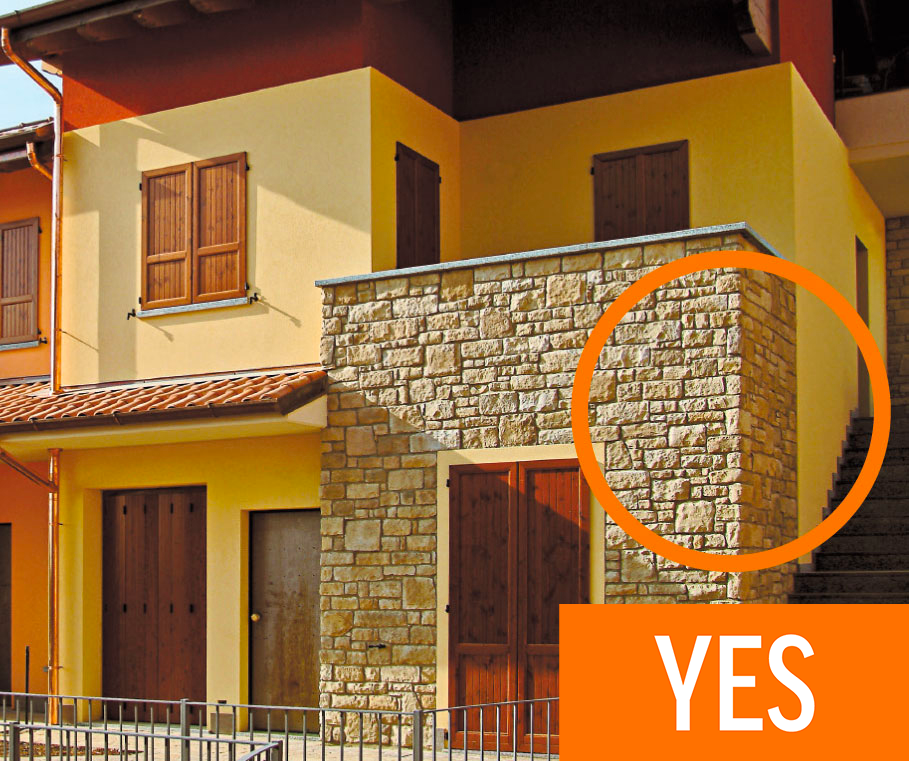
YES : The use of corner pieces in structural details gives the Geopietra® wall covering a convincing three-dimensional nature and makes it perfectly realistic.
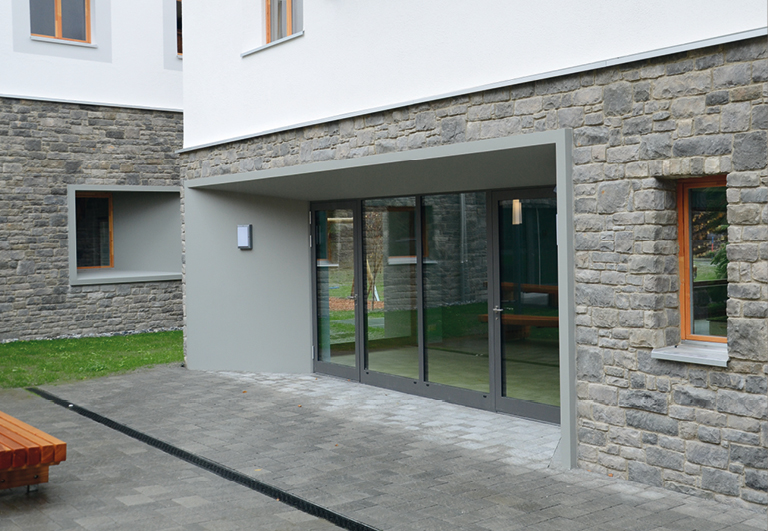
PARTIAL WALL COVERINGS
When renovating old stone houses any interesting wall sections to be restored should be left visible, and as a result embedded with respect to the new plaster.
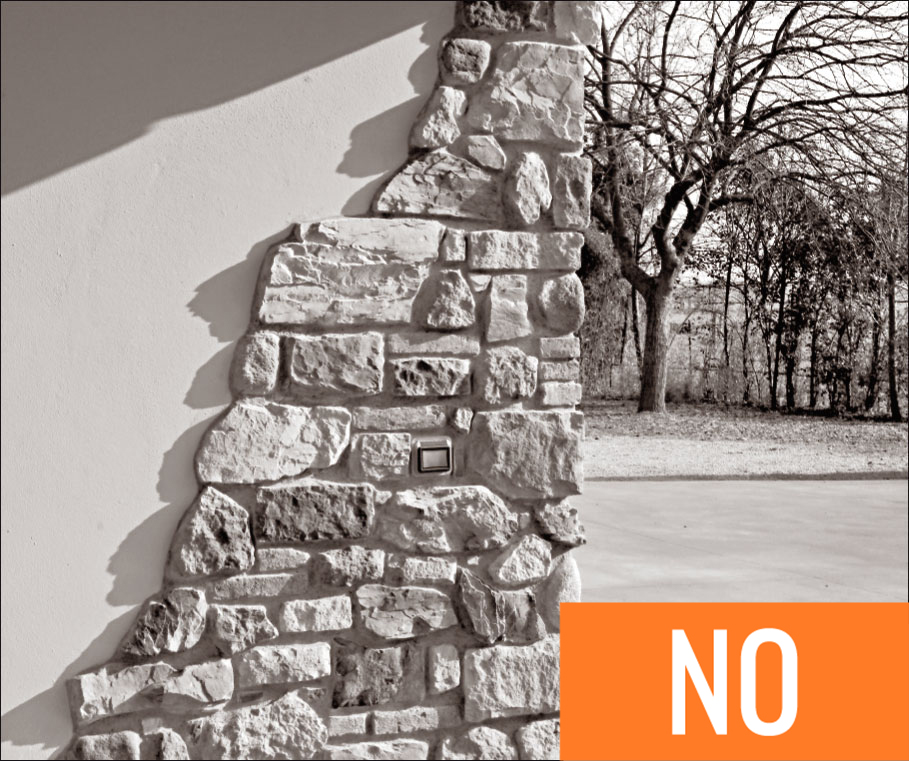
NO : The partial covering on the wall was NOT finished off as required to make it look authentic. Only the decorative nature of the stone is highlighted. The need for the manufactured stone veneer to be thin must not be ‘detected’ with the installation, so that an authentic result and three-dimensional quality are obtained.
YES : For the partial installation of the Geopietra® covering the thickness of the uncovered wall was increased by applying insulation. It is also possible to create a recess in the wall where the covering can be installed. With both solutions the wall covering acquires a visual three-dimensional quality.
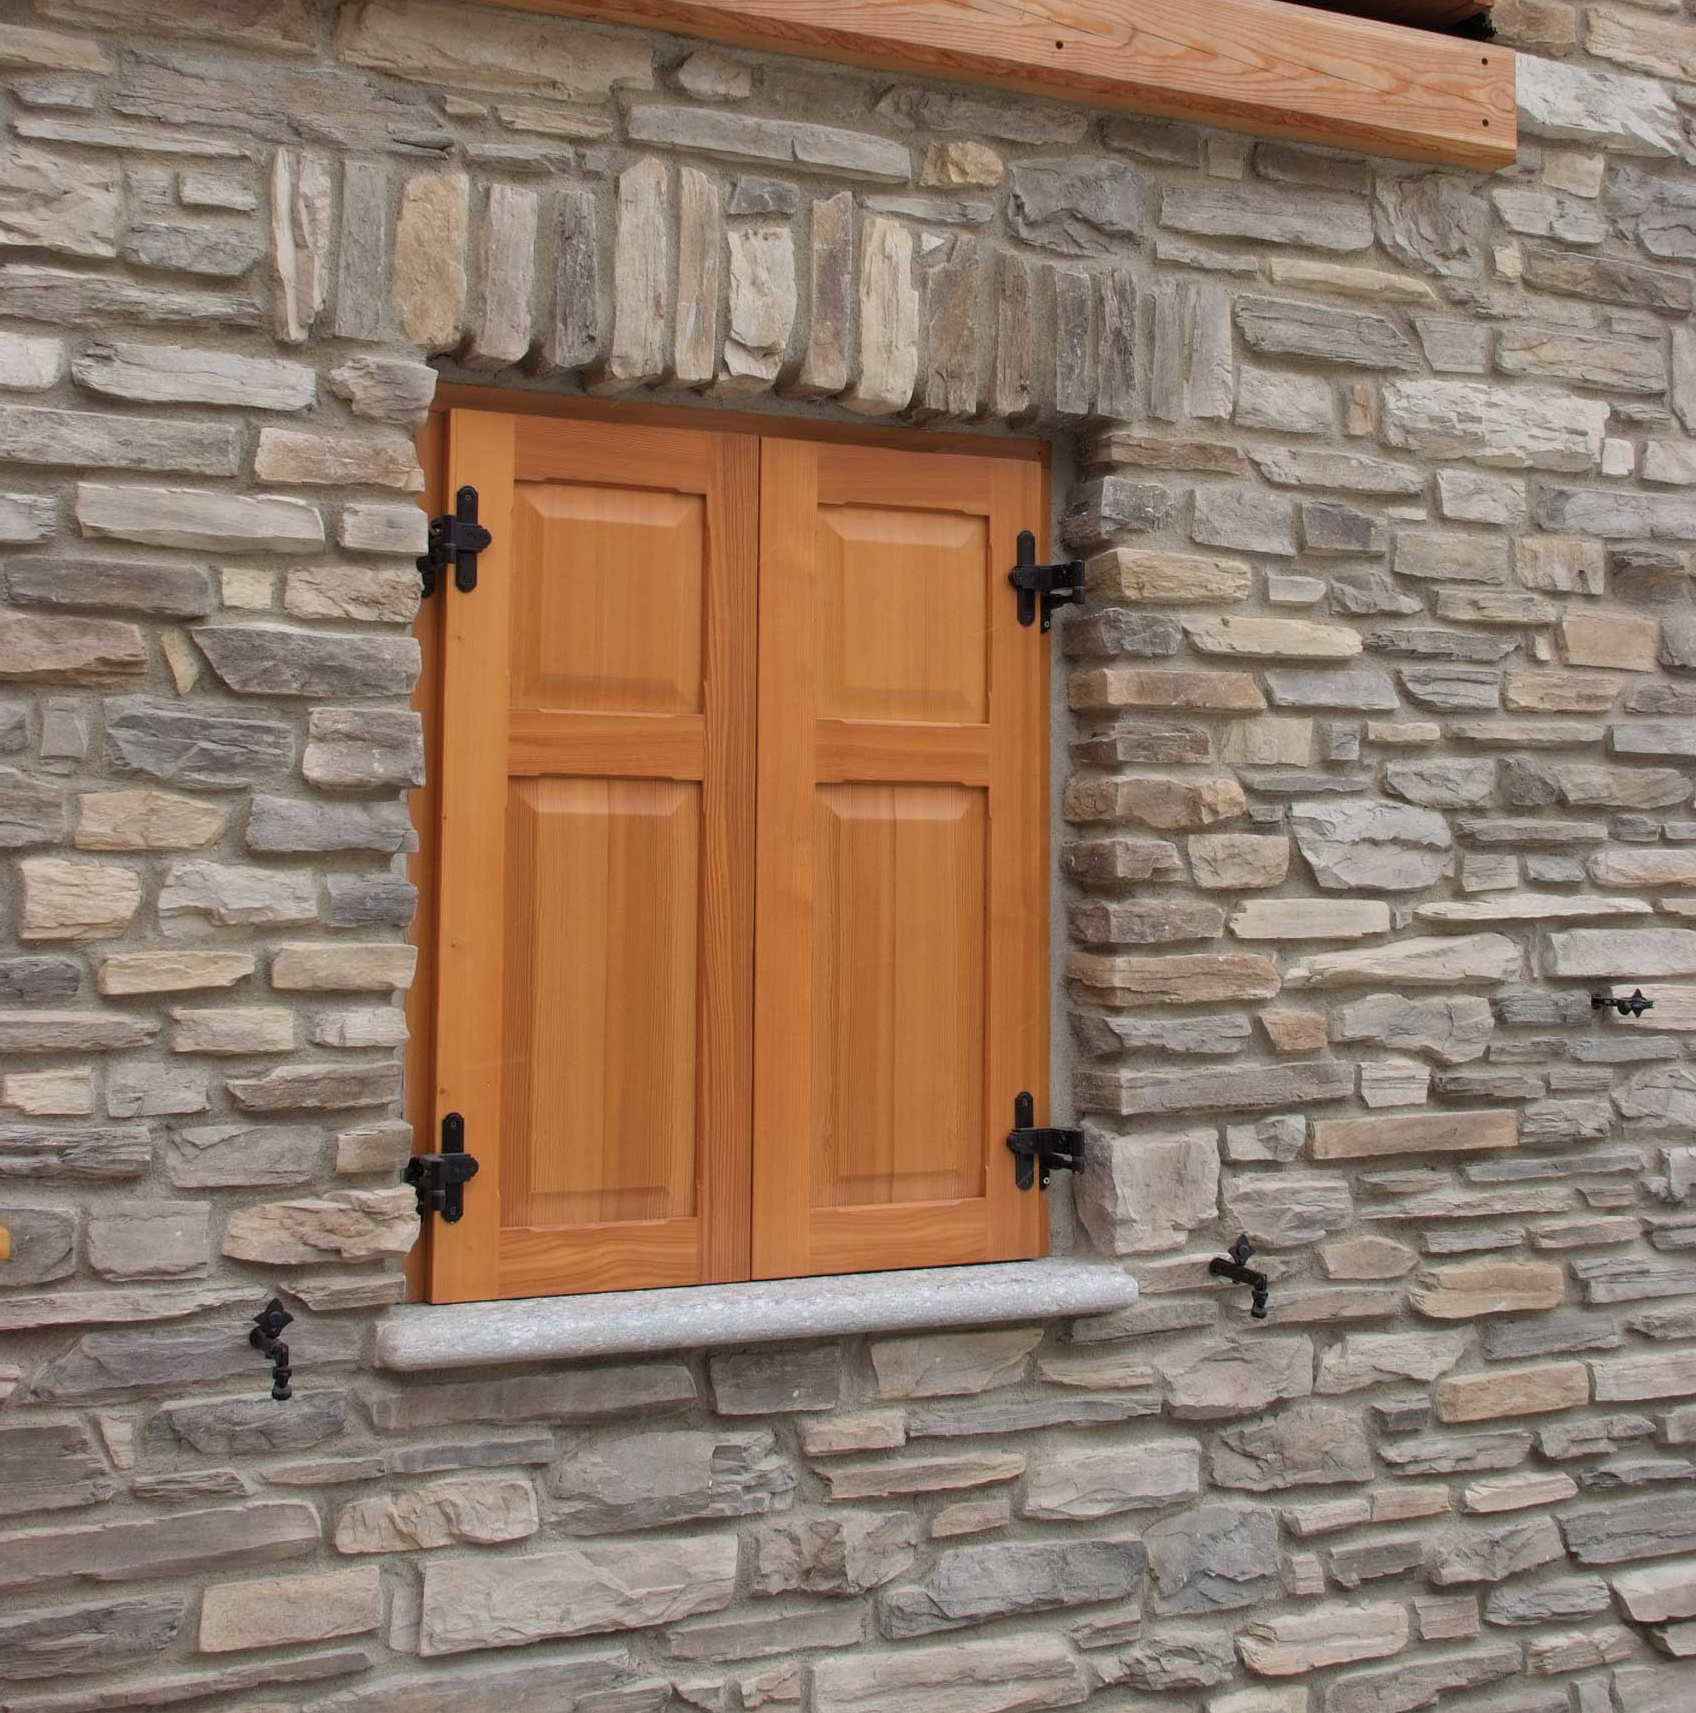
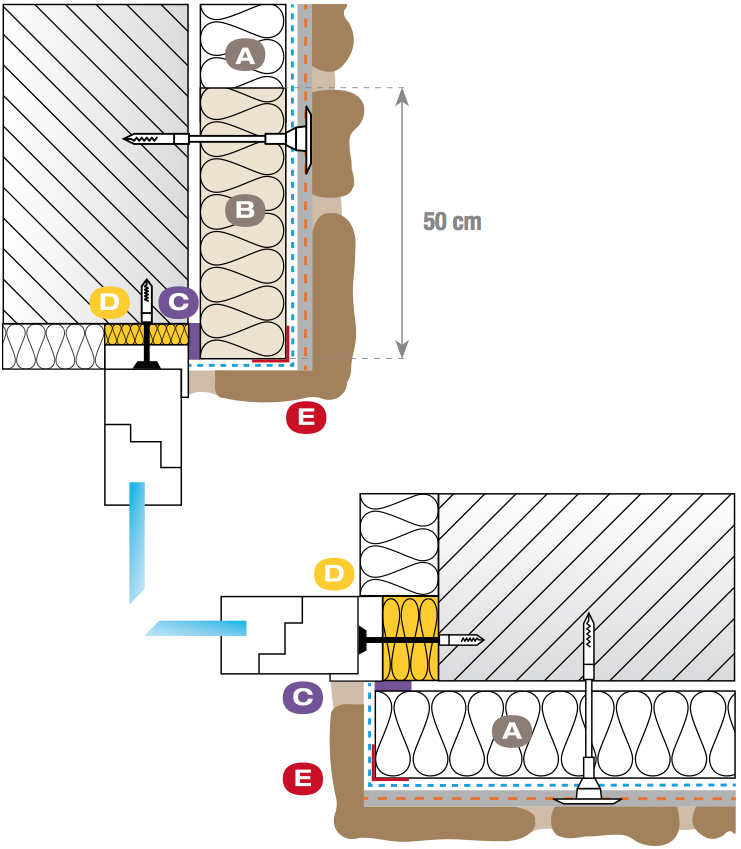
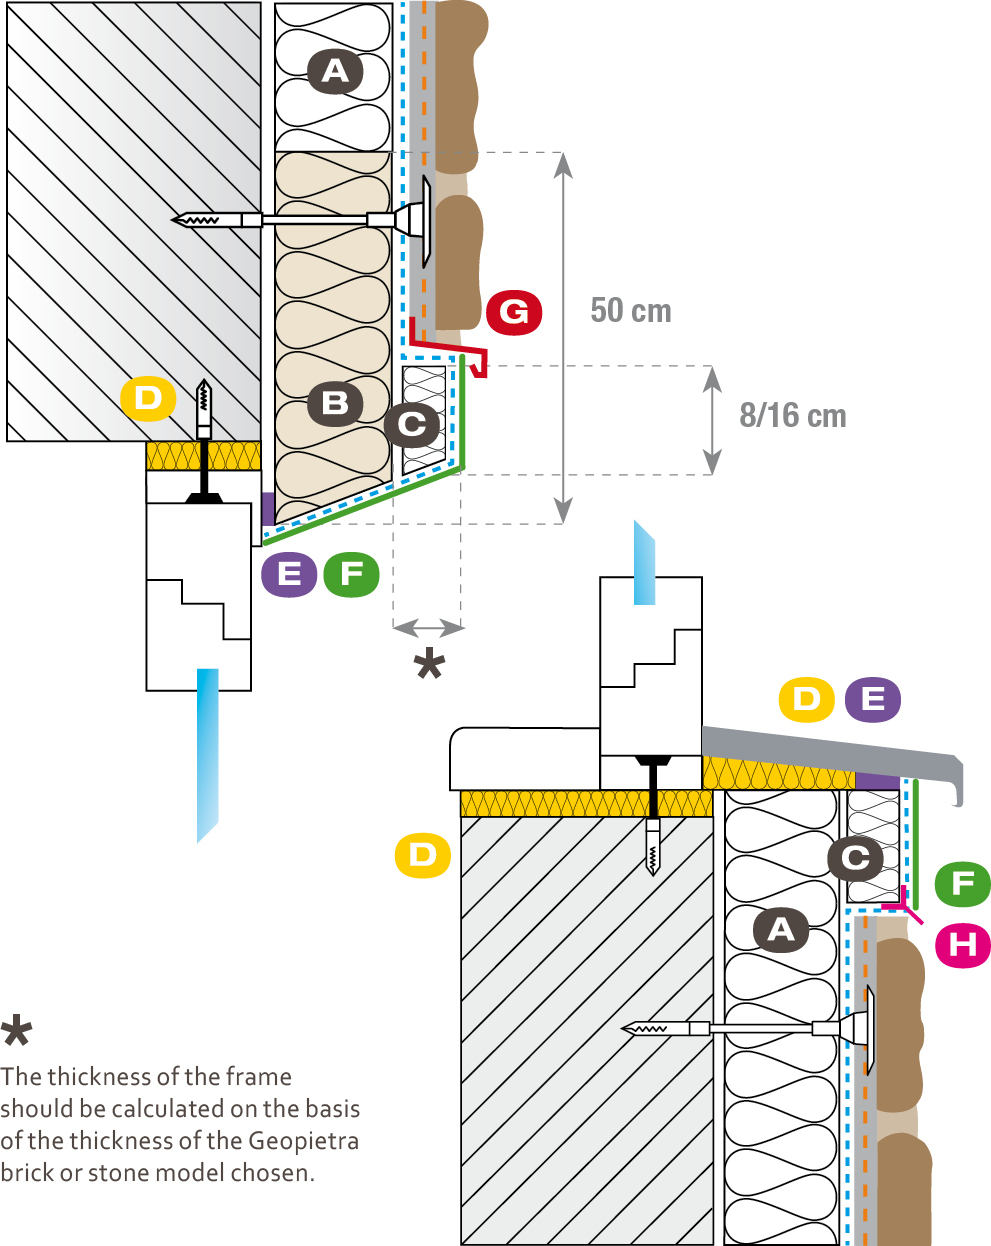
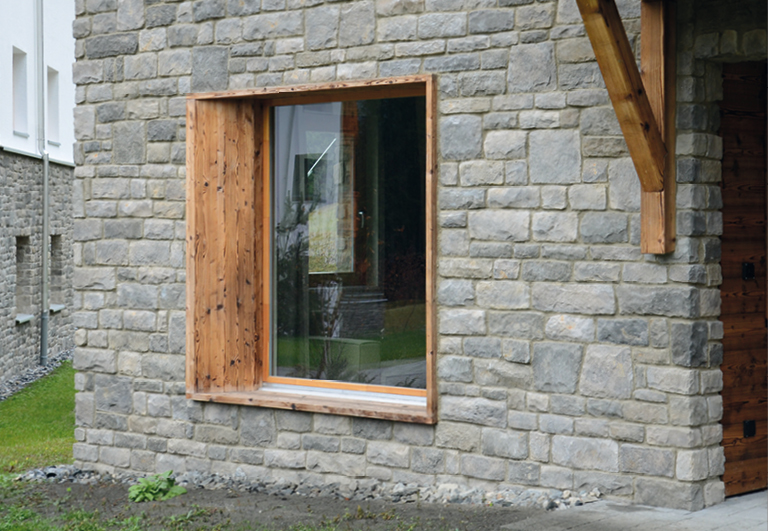
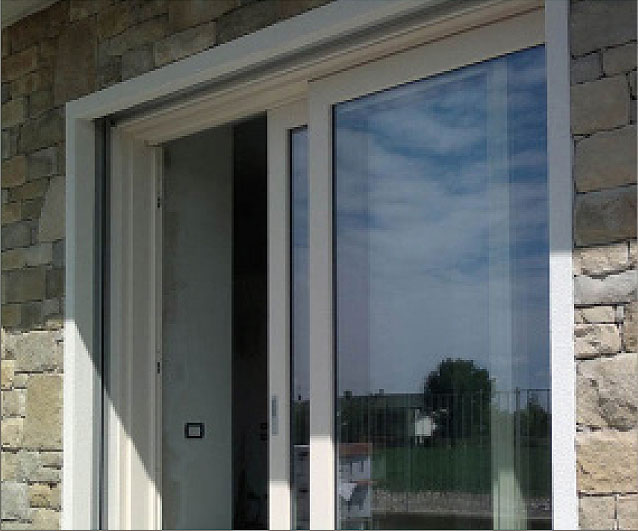
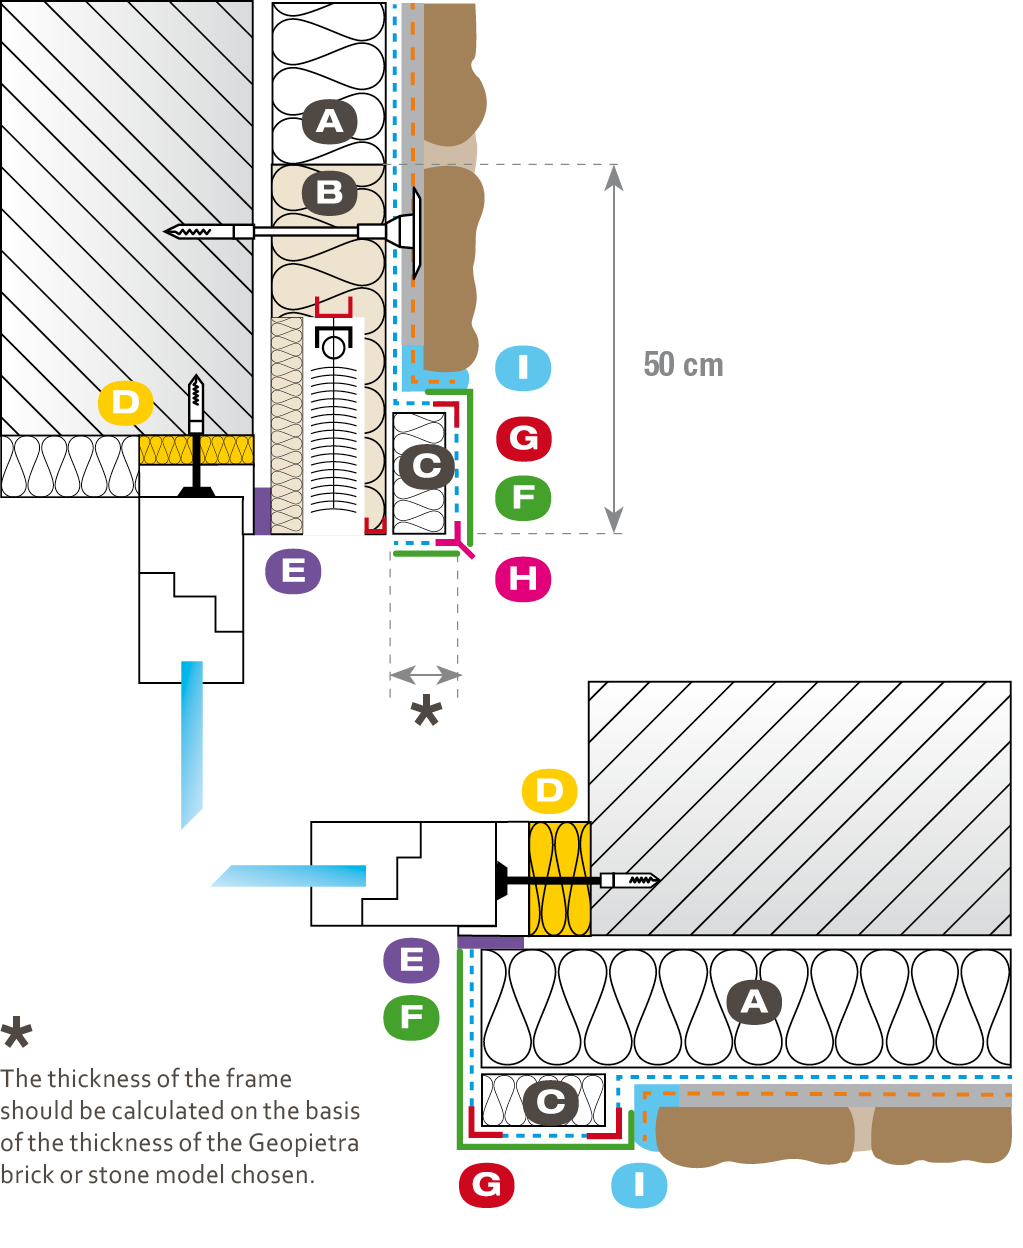
For plaster finishes on window and door openings a frame must be fitted which is approximately 6-cm thick, in order to conceal the thickness of the stone. This frame can be made from off-cuts of insulation material glued to the insulation using a suitable adhesive, and a reinforcement mesh trimmed and embedded. Cover the frame with coloured finishing plaster.

Window edge with frame finished and coloured
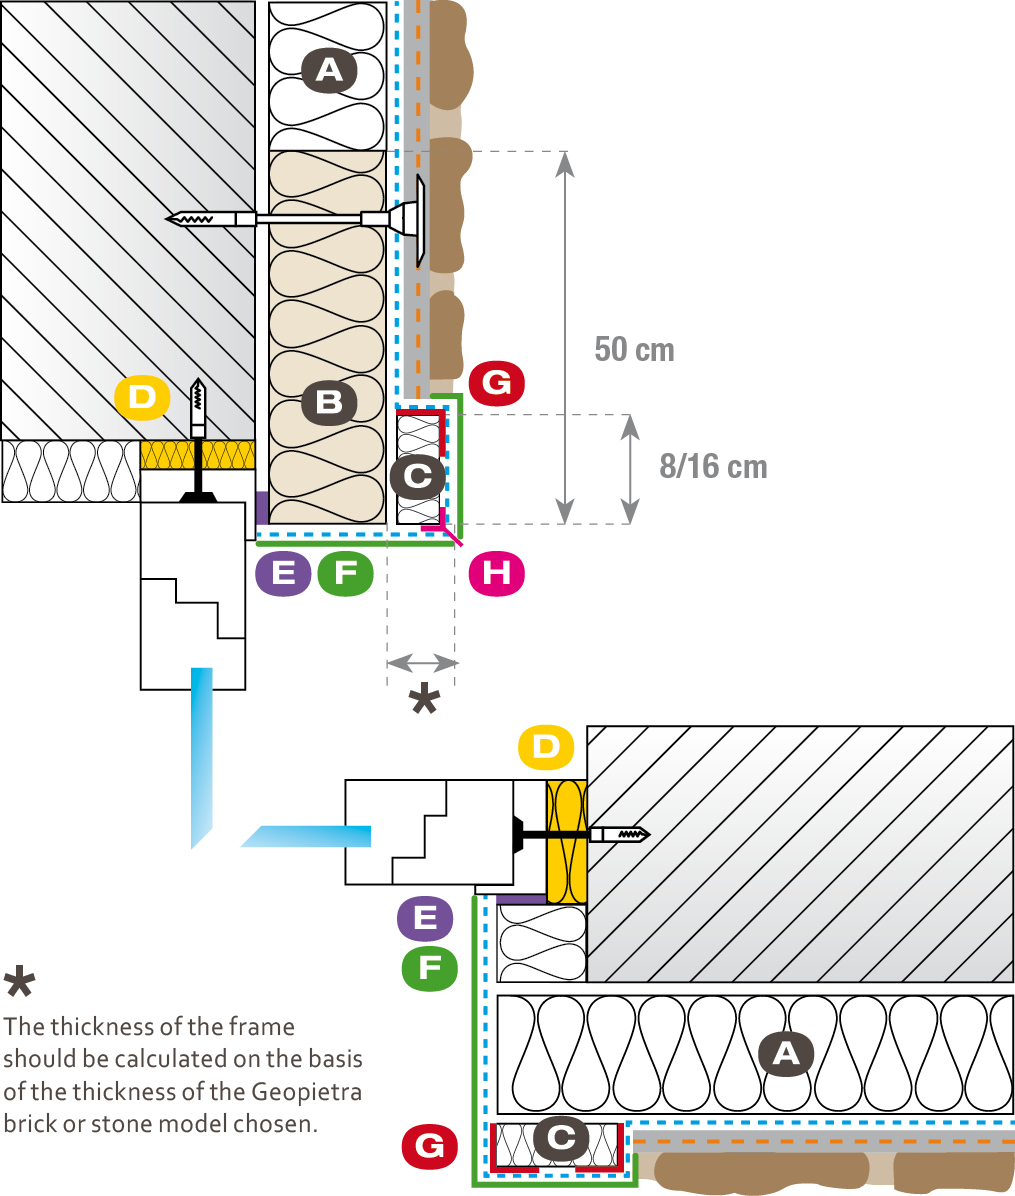
A. Insulation panel
B. Fireproof safety panel
C. Frame with reinforced insulation material applied
D. Polyurethane foam
E. Strip of seal
F. Layer reinforced with mesh and finish to follow
G. Corner profile
H. Profile with drip feature
To make the jambs flush with the stone cover the window border with insulation material. Then cut the frame with the cutter to insert the stone such that once grouted with the mortar it is embedded flush. Leaf hinges can be secured to the edge created, having already arranged special assembly mounts before installing the insulation.
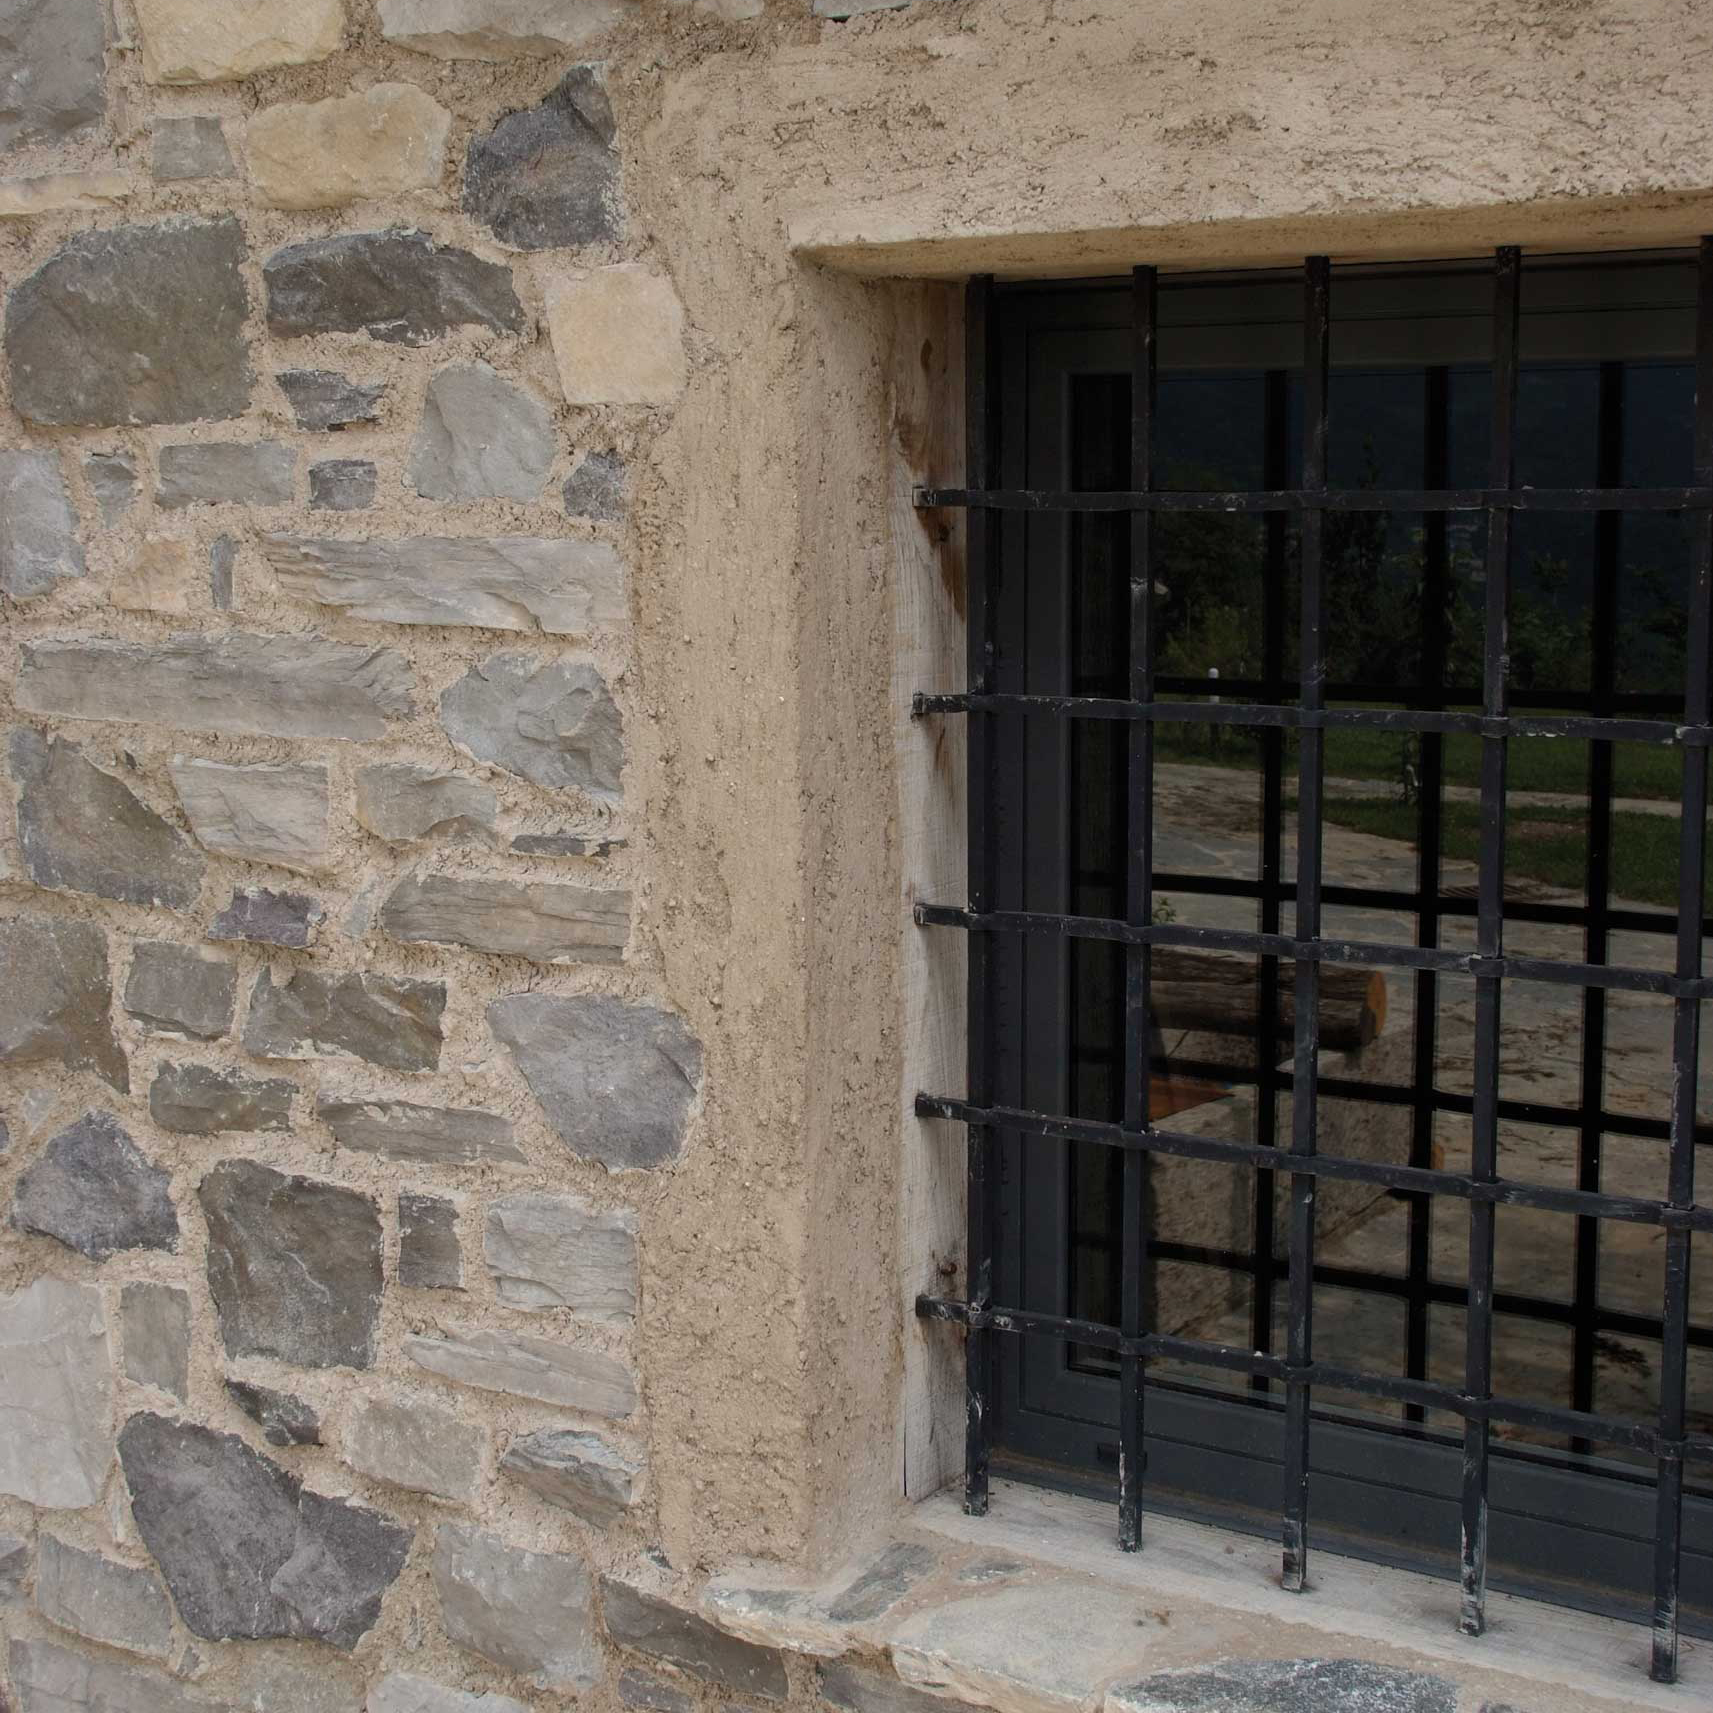
Window border with stones embedded flush
A. Insulation panel
B. Fireproof safety panel
C. Frame with reinforced insulation material applied
D. Polyurethane foam
E. Strip of seal
F. Embed the stone using the cutter to cut a part of the insulation.
G. Corner profile
H. Skim coat with GeoBi mortar.
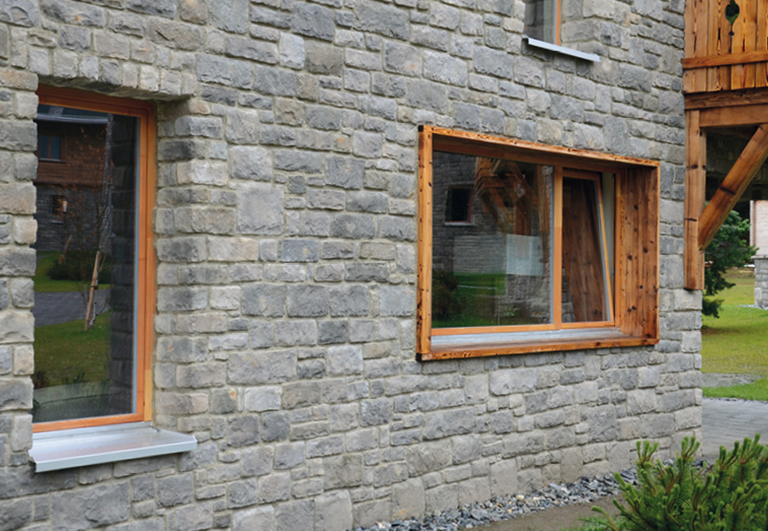
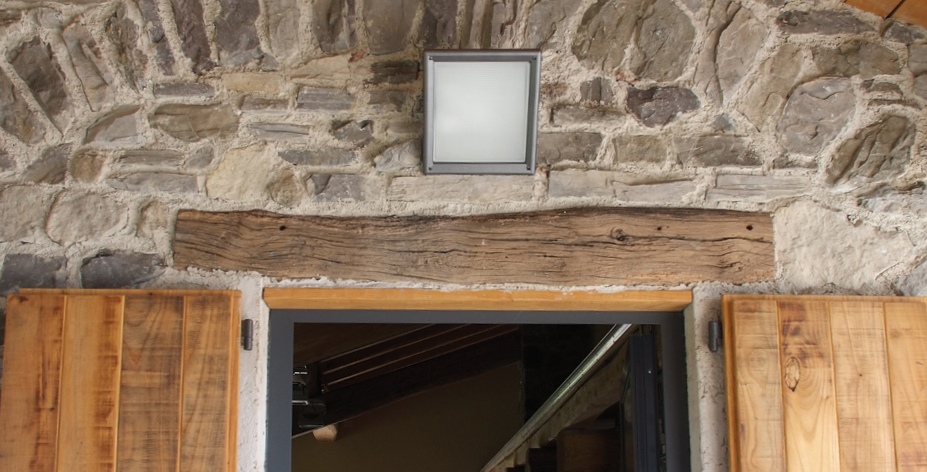
A small wooden beam used to be inserted above windows in many stone constructions and had a twofold function - to provide initial support for the arching and decorate the window. To reproduce the same visual effect fit the stones on the side corners of the opening first, up to the required height, and insert the beam with a length equal to the opening, resting it on the corners, then proceed with the flat stones.
In the case of large openings with long beams arrange fasteners in the central section.
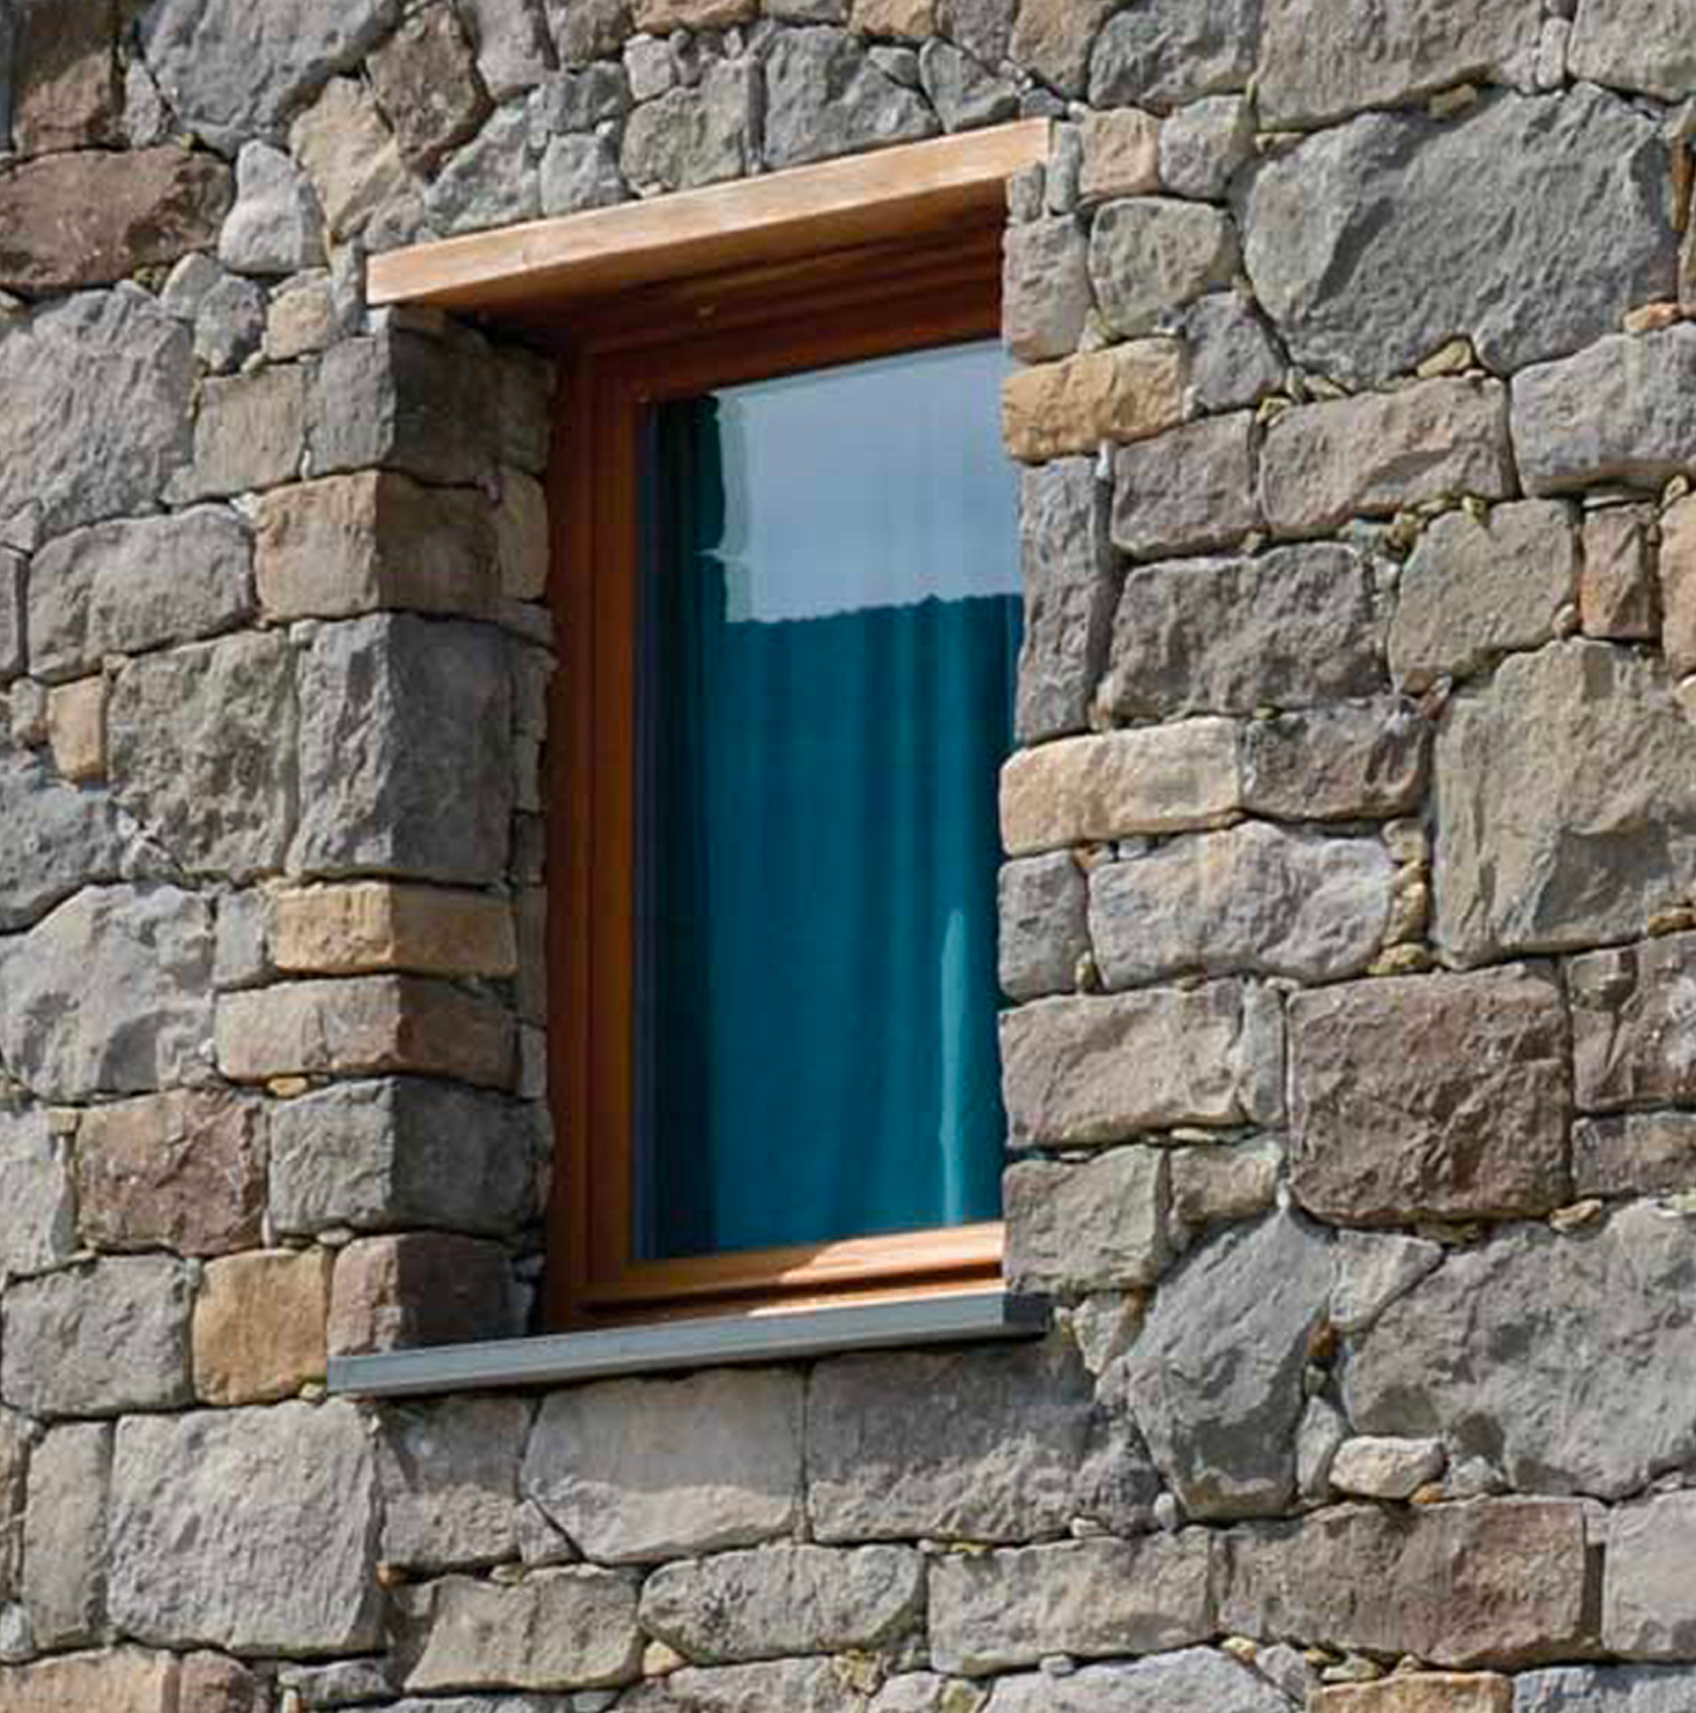
Window architrave with support strip
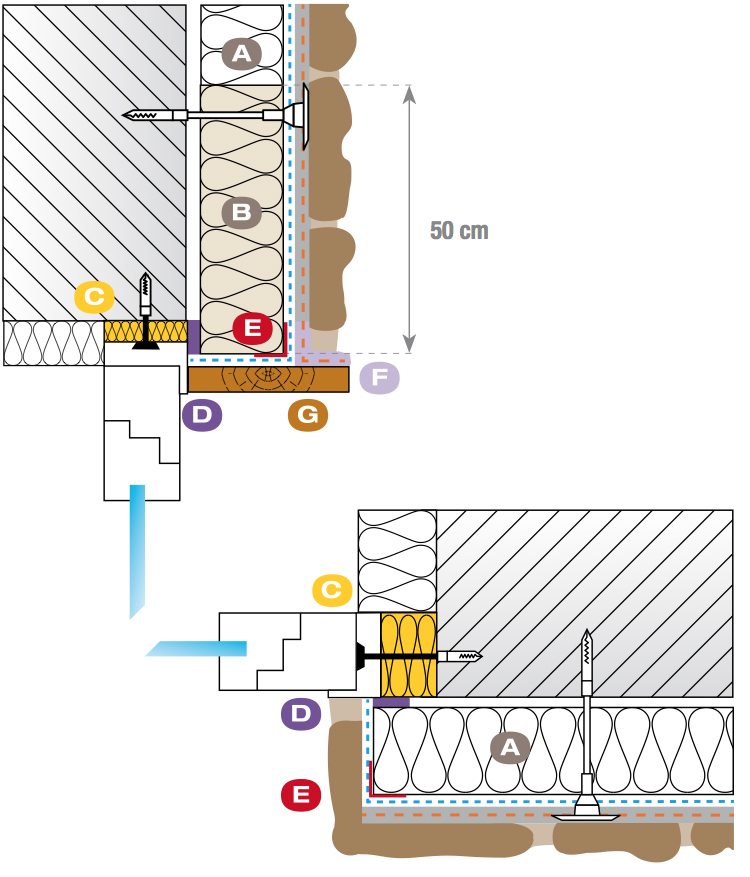
A. Insulation panel
B. Fireproof safety panel
C. Polyurethane foam
D. Strip of seal
E. Corner profile
F. Elastic waterproofing reinforced with Georete mesh
G. Closure strip
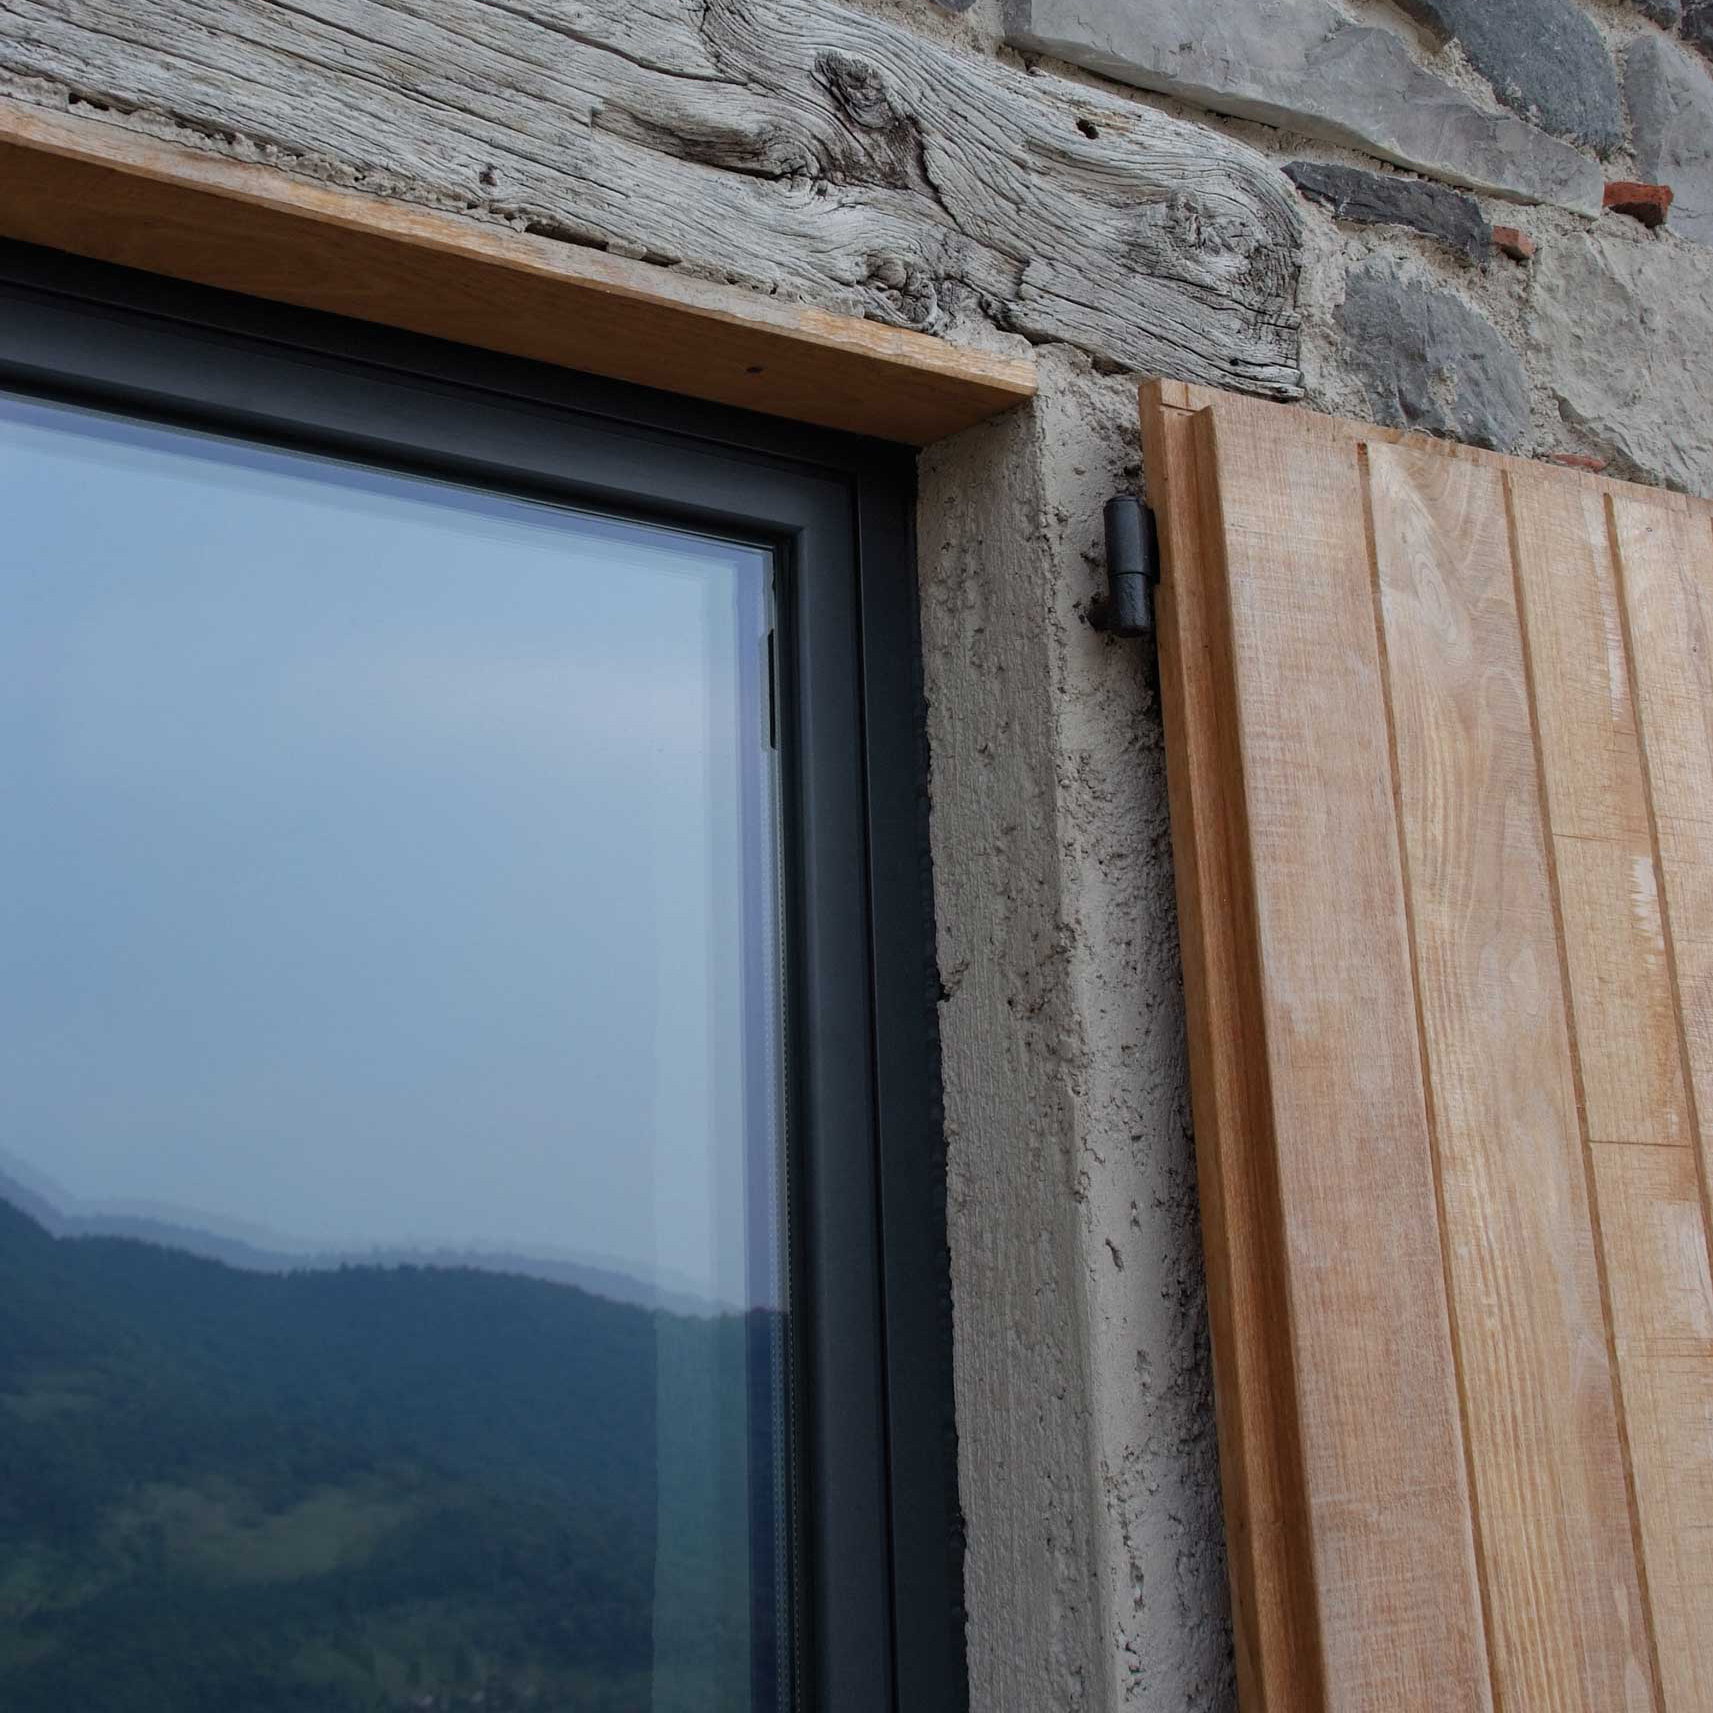
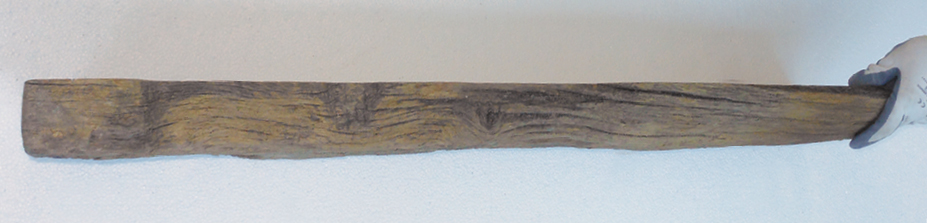
The simple insertion of a decorative beam satisfies, even if only visually, the need for a wall support above door and window openings and makes the work look authentic. Fit a wooden beam sawed to the thickness of 5-6 cm to the upper part of the opening and cover the rest of the border with installation material. To fit any leaf hinges use special assembly mounts fitted before installing the insulation.
Window architrave with wooden beam
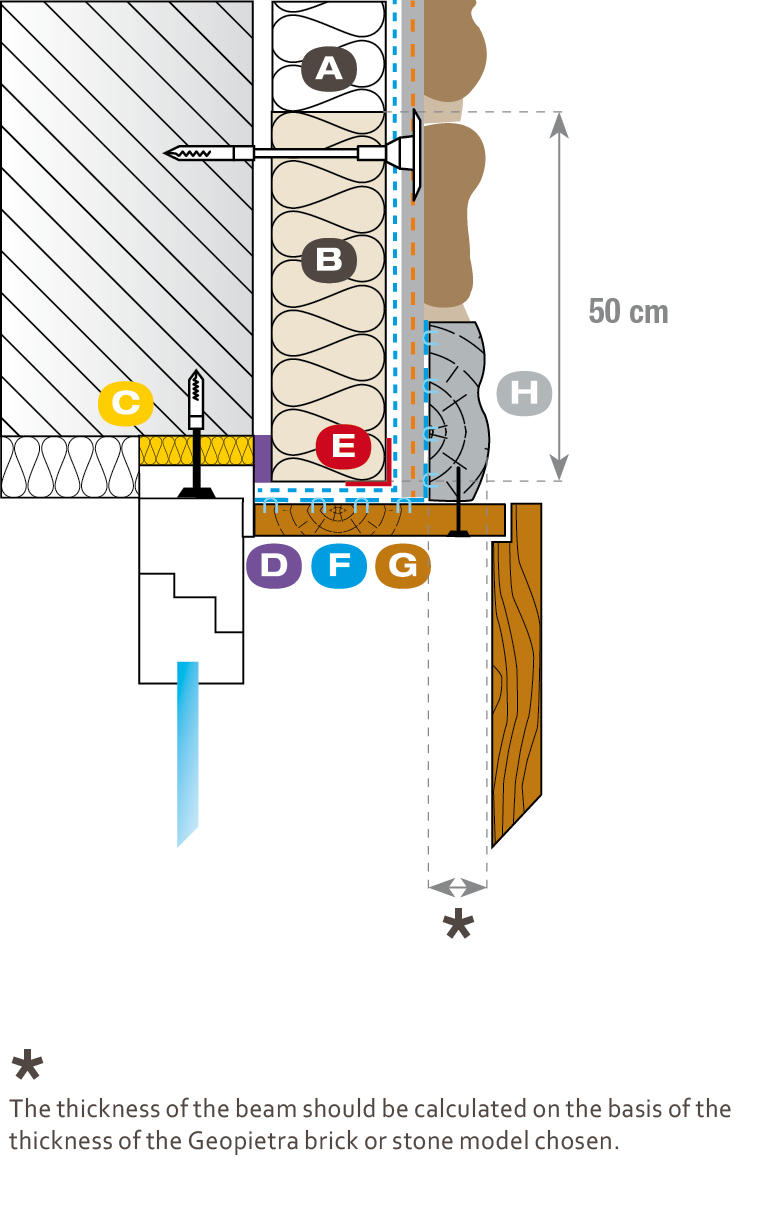
A. Insulation panel
B. Fireproof safety panel
C. Polyurethane foam
D. Strip of seal
E. Corner profile
F. Galvanised metal mesh with large mesh secured with staples
G. Closure strip
H. Wooden beam section.
To make the architrave more authentic extend the arch by a couple of stones past the window panel.
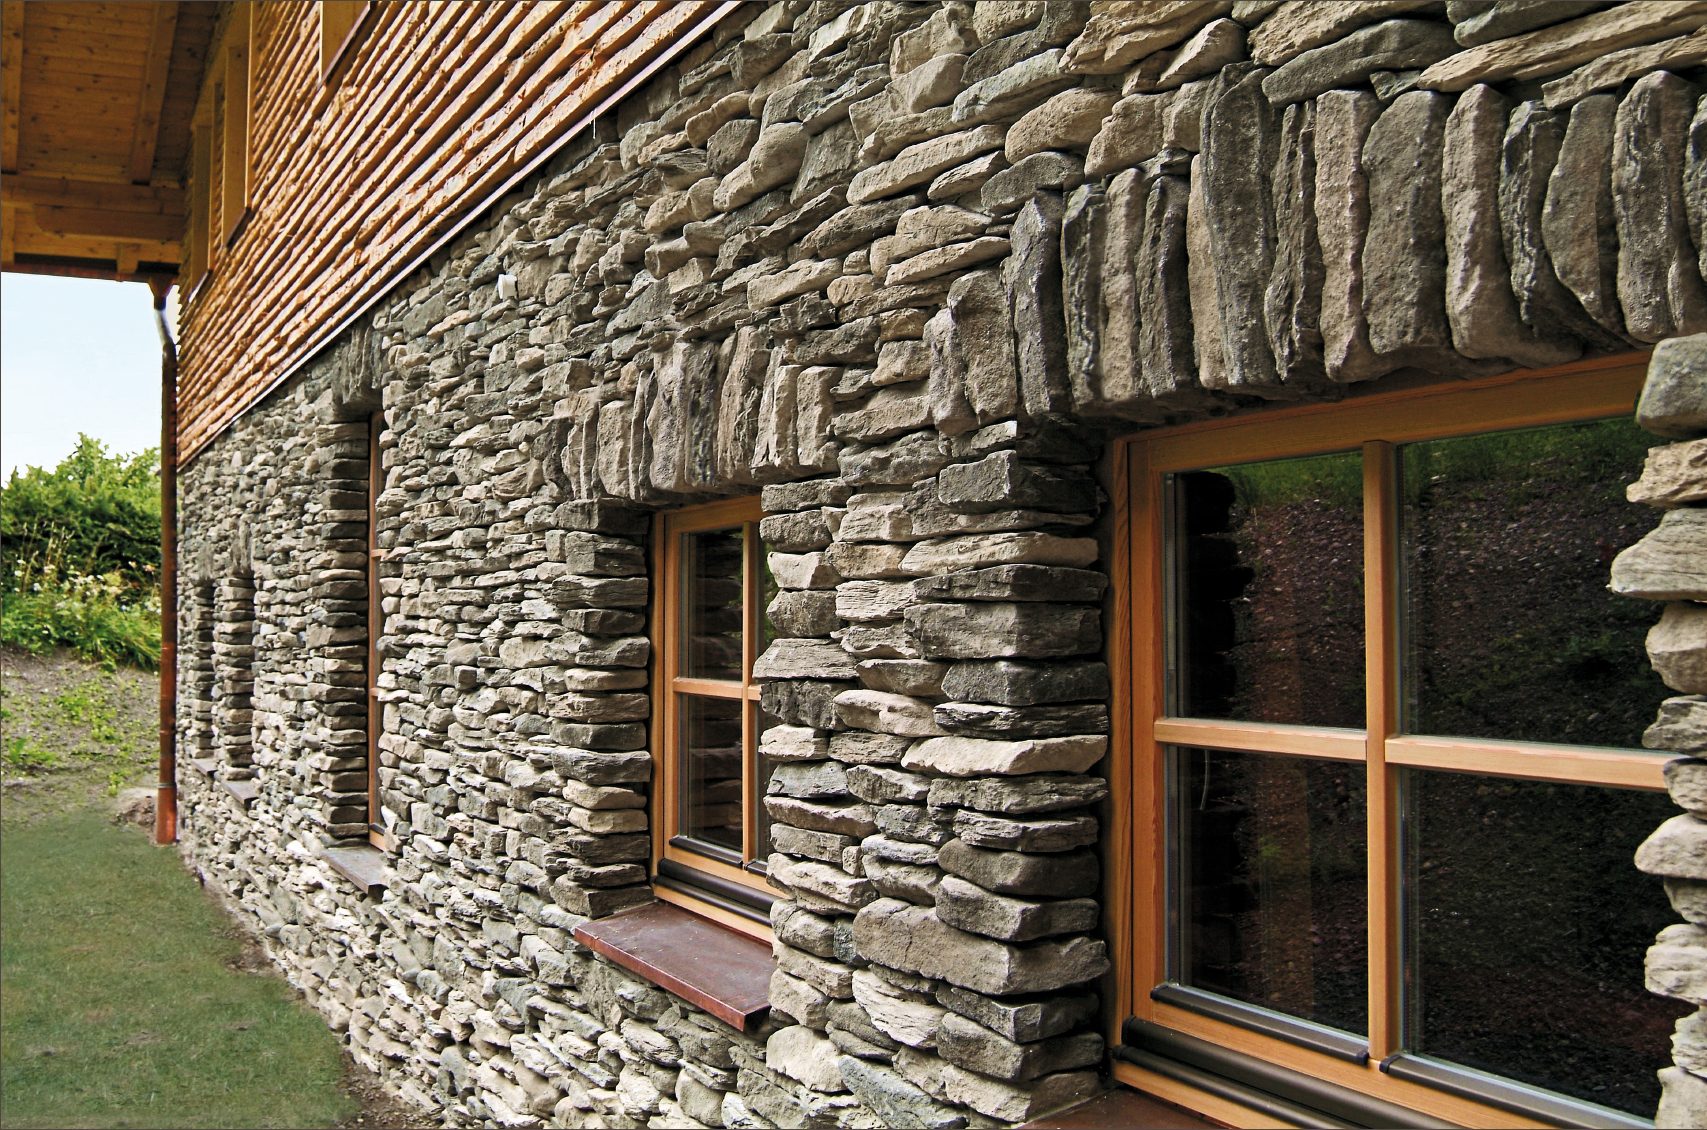
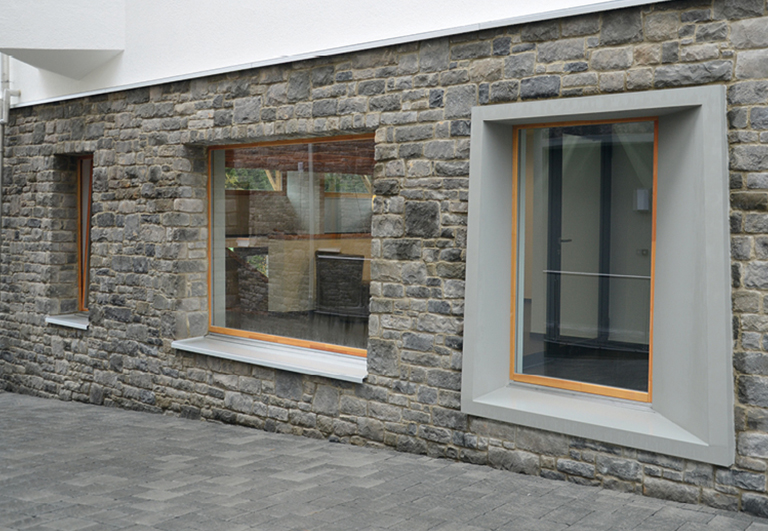
Window and door embrasures can be covered with corner pieces in manufactured stone veneer in the model chosen, remembering that the irregularity of the surface will not permit door leafs to be fitted.
Monoblocks can be used for inserting leafs, where the closure is separate from the corner finish.
Window border with embrasure covered in stone
A. Insulation panel
B. Fireproof safety panel
C. Strip of seal
D. Polyurethane foam
E. Corner profile
Windows and door frames can be finished off in various ways and some examples have been provided.
The cross-section at the side shows the ideal procedure for installing a frame with skewed jambs.
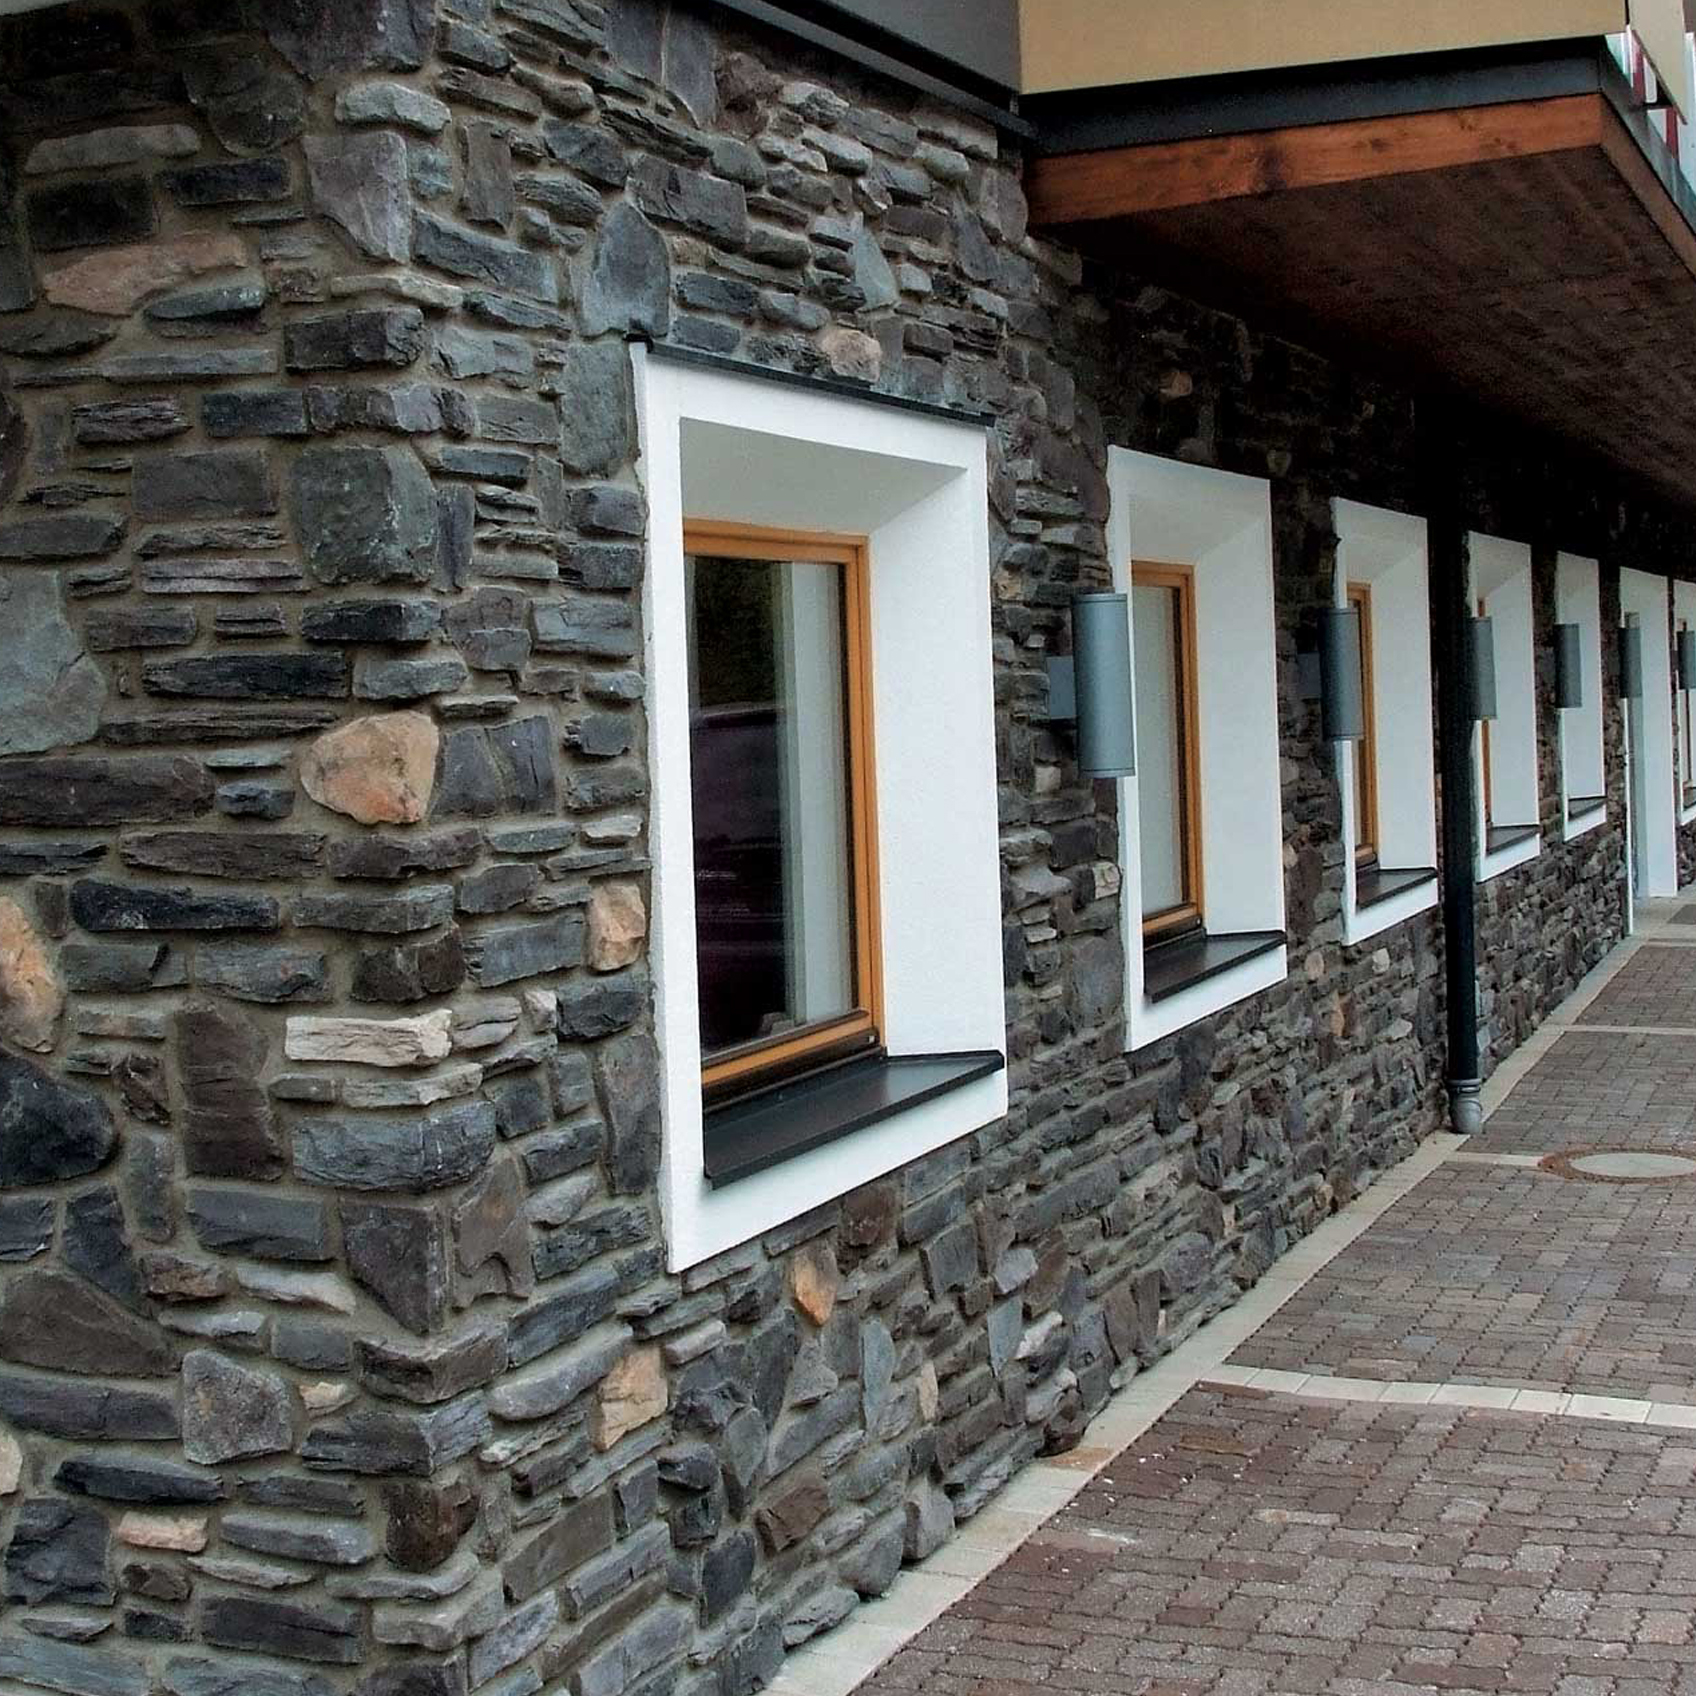
Window border with architrave and skewed jambs
A. Insulation panel
B. Fireproof safety panel
C. Frame with reinforced insulation material applied
D. Polyurethane foam
E. Strip of seal
F. Layer reinforced with mesh and finish to follow
G. Aluminium profile with drip feature
H. Profile with drip feature
When finishing off doors and windows maximum care must be taken with joints between coverings and the material bordering the opening, where thermal bridges can transpire and thermal expansion can cause cracks.
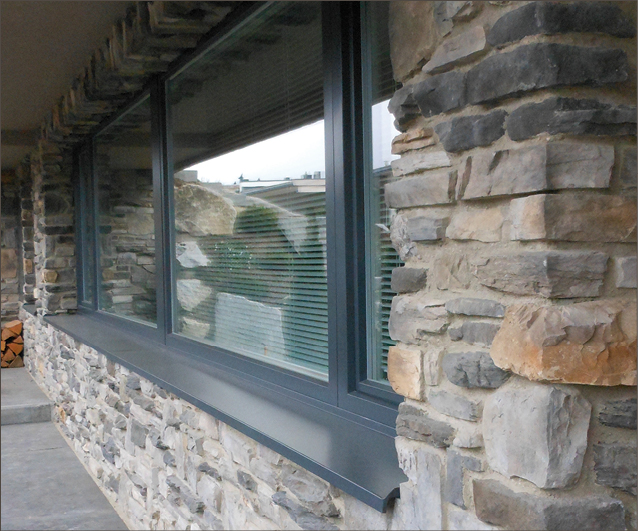
Window ledge with drip feature
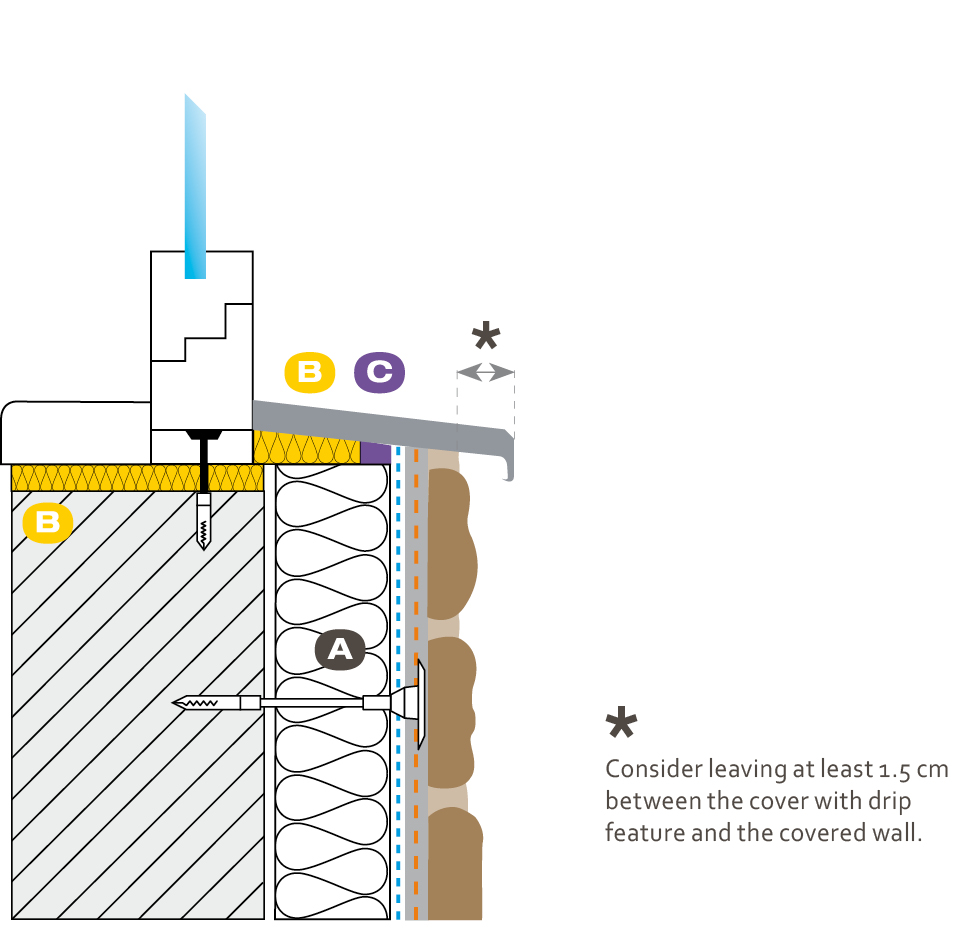
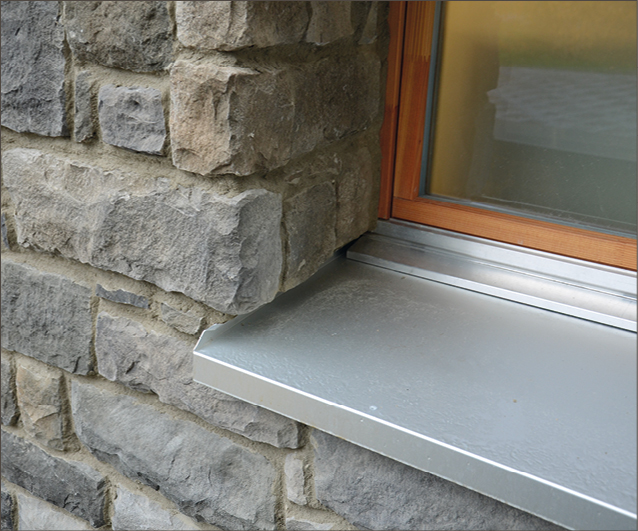
A. Insulation panel
B. Fireproof safety panel
C. Strip of seal
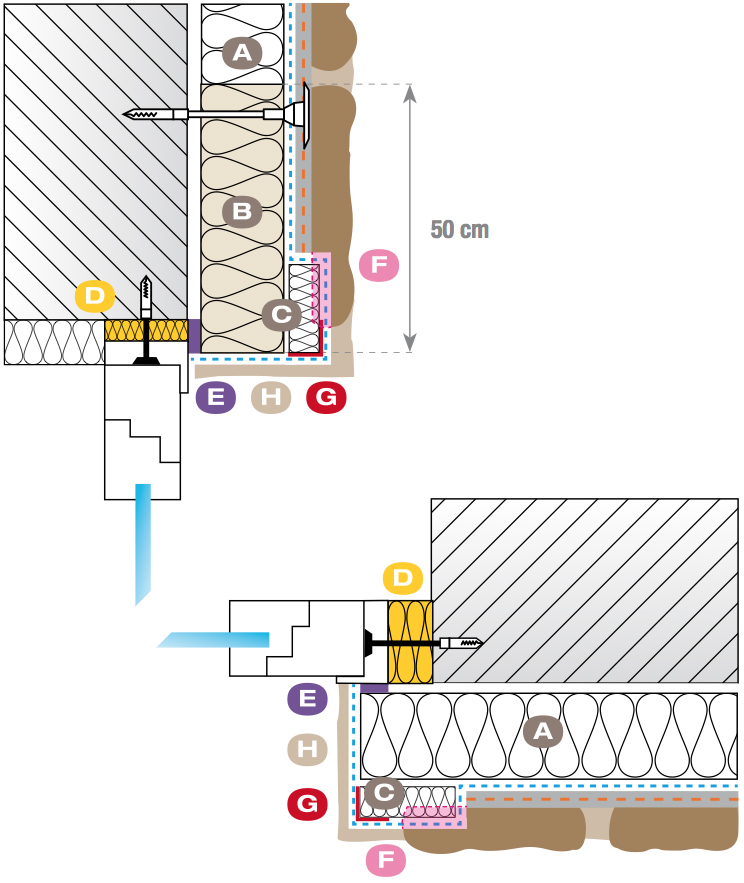
For finishes on window and door openings with built-in sunscreen a frame must be fitted which is approximately 6-cm thick, in order to conceal the thickness of the stone. This frame can be made from off-cuts of insulation material glued to the insulation using a suitable adhesive, and a reinforcement mesh trimmed and embedded. Cover the frame with coloured finishing plaster.
Window border with built-in sunscreen
A. Insulation panel
B. Fireproof safety panel with built-in sunscreen
C. Frame with reinforced insulation material applied
D. Polyurethane foam
E. Strip of seal
F. Layer reinforced with mesh and finish to follow
G. Corner profile
H. Profile with drip feature
I. Elastic waterproofing reinforced with Georete mesh
murogeopietra can be matched with numerous finishes depending on the kind of look required.
One example is the continuation of classic loadbearing beams over doors in many homes typical of mountain dwellings, which are usually difficult to insert, especially with current construction systems i.e. with the presence of insulation where thermal bridges are essential.
The procedure outlined below has been tested by Geopietra® in many constructions, and makes it possible to obtain the appearance desired, e.g. with stone, while complying with all the requirements of the underlying base.
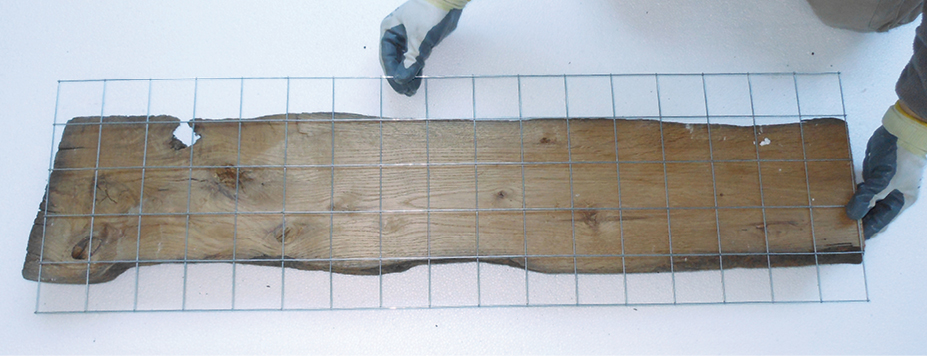
Take the selected wooden beam and cut the part to be visible to a thickness of approximately 5-6 cm.
Staple a 5x5 cm galvanised metal mesh to the back with the edges overhanging by at least 7-8 cm.
Using Geocoll® in two applications glue the beam to the base before installing the murogeopietra, covering the mesh totally.


The corner has always played an important role in the supporting masonry, as it is a lifeblood for the stability of the whole structure. Depending on the area and architectural style, there are different typologies of corner stones.
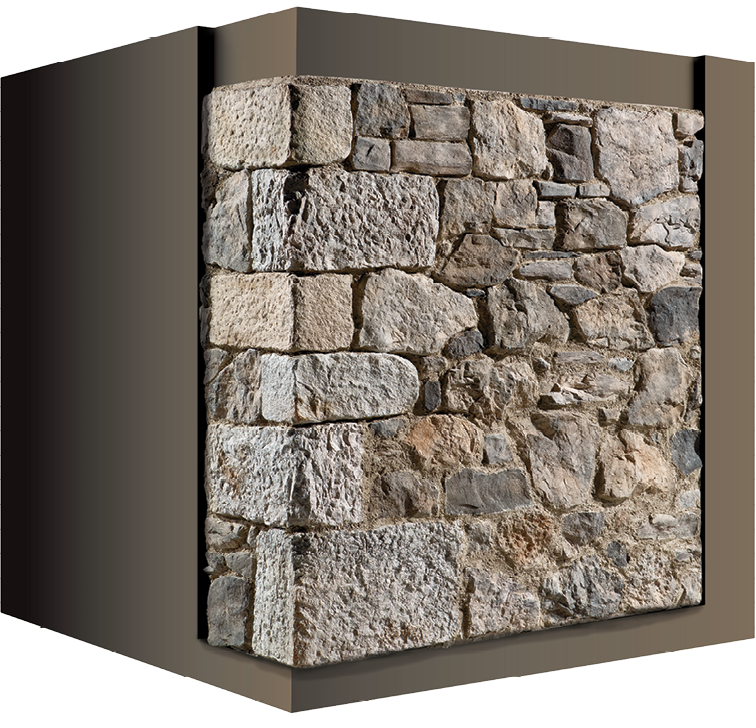
MODEL | ANTICO CANTONALE P43
SHADES | BIANCO B
mixed HEIGHT 18 / 48 cm~
mixed LENGTH 38 / 50 cm~ / THICKNESS 4,5 / 5 cm
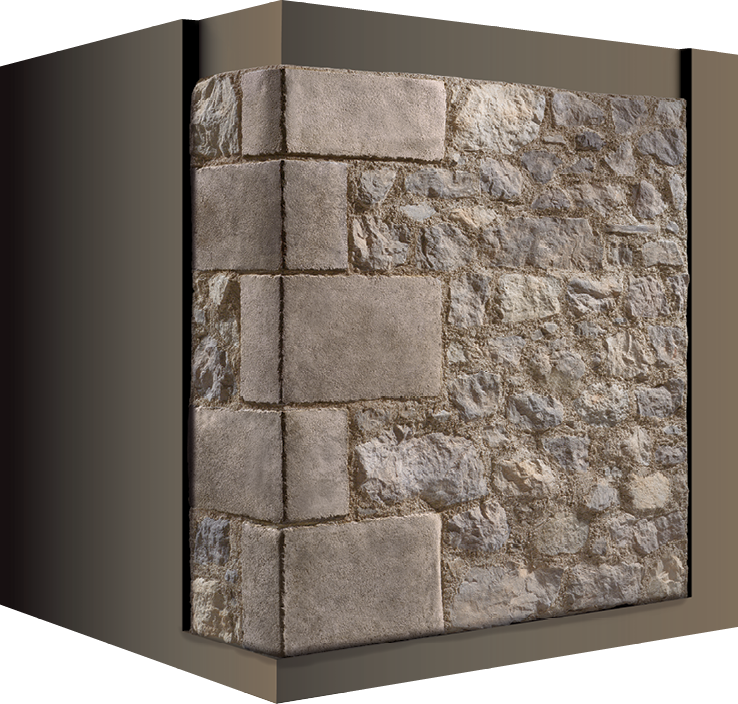
MODEL | SQUADRATO CANTONALE P40
SHADES | BIANCO B | MARRONE M | GRIGIO G
mixed HEIGHT 30 / 35 cm / LENGTH 50 cm
THICKNESS 4 / 5 cm
